jssouthtx
Well-Known Member
- Messages
- 149
- Location
- New Braunfels TX
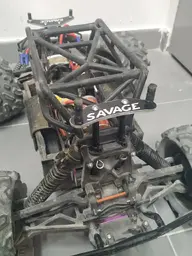
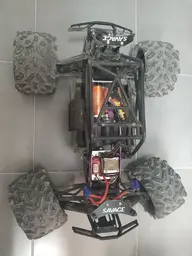
Got the rrp spur gear installed and 6 tanks run thru for break in. Soon as I find a pipe and some glow plugs it’ll get tuned.


Follow along with the video below to see how to install our site as a web app on your home screen.
Note: This feature may not be available in some browsers.


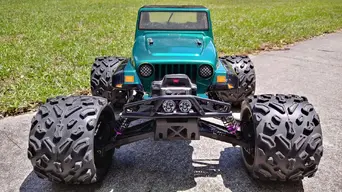
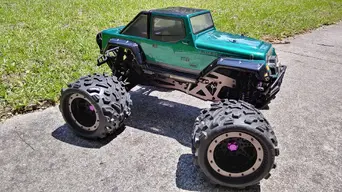
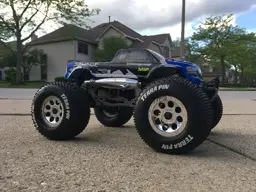
Yep shes pretty wide now and I am running the XL wide axles to. Suppose I could swap over the axles from my savage cd conversion and see how that goesWow! Those are really out there!
I put the wide super HD cups/axles on my X so I could run 0 offset wheels. The intent was to run 3.8" trenchers, but they were too hard on it and made it tough to tune right. Before, I was running 1/2" offest wheels with stubby super HD cups/axles. I don't think I'd like the extra leverage running 1/2" offset wheels with the longer shafts. Make it too likely to break stuff on bad landings... which I tend to have a lot of. 🙂Yep shes pretty wide now and I am running the XL wide axles to. Suppose I could swap over the axles from my savage cd conversion and see how that goes
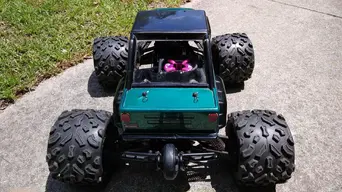
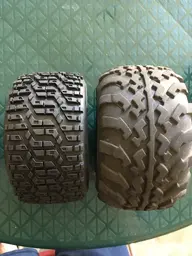
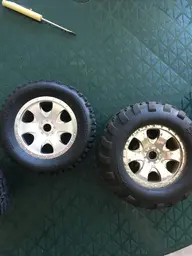
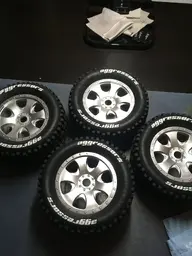
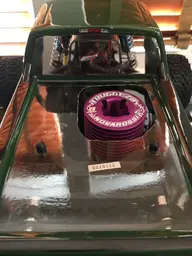
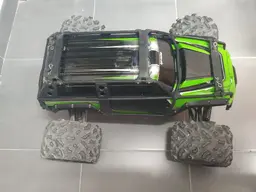
Decided to do something a little different with my wheel setup. I’ve always liked the Hellfire tires so I decided to match them up with some Warlock flat chrome wheels and I really like it. I’m going to white out the “aggressors” logo soon. ?
I never had good luck with the HPI wheels. Even with 17mm, I'd tend to round a hex out.
Productive day haha
I was. The hex would usually strip when I was removing the wheel nut and it was stuck. I stripped 2 or 3 of those wheels removing the wheel nut. Then I'd have to totally destroy the wheel with a dremel to cut the center out of it so I could put pliers on the actual hex to break the nut loose. I had that happen back in my t-maxx and aftershock days as well when I ran 14mm hexes...I've got two sets of warlock wheels, never rounded a hex. Pays to be vigilant with the wheel nuts I guess. 😉
I was. The hex would usually strip when I was removing the wheel nut and it was stuck. I stripped 2 or 3 of those wheels removing the wheel nut. Then I'd have to totally destroy the wheel with a dremel to cut the center out of it so I could put pliers on the actual hex to break the nut loose. I had that happen back in my t-maxx and aftershock days as well when I ran 14mm hexes...
Doesn't help that the 17mm hexes that come on the savage's don't have the sharpest of corners to really lock in to the hex on the wheel.
I believe you can use those without the rear cage for other wheels as well. Very nice upgrade over stock and does away with the need for the weird HPI flanged nuts. I've busted my fair share of those things as well.True enough.
@NitroNick, you could try Hot Racing's Warlock hex kit. Likely wouldn't have an issue then.
https://hot-racing.com/?partnumber=HSF10X07;c=462
Yeah I’ve seen that and considered it, I would do it if I had a problem but I lock down my wheels very tight everytime so until then I’ll rock the stock setup!True enough.
@NitroNick, you could try Hot Racing's Warlock hex kit. Likely wouldn't have an issue then.
https://hot-racing.com/?partnumber=HSF10X07;c=462
Welcome to HPISavageForum, a friendly forum to discuss the Savage RC Truck.
Your voice is missing! You will need to register to get access to the following site features:We hope to see you as a part of our community soon!