These engines build compression due to the sleeve being tapered ever so slightly at the top. The taper usually starts above the exhaust port and it "pinches" the piston. It's termed as "pinch" in RC. When the engine heats up, the sleeve expands which alleviates the binding of the pinch but still retains a close enough mechanical fit to seal and create compression. This is why you will see people saying not to turn an engine over unless your trying to start it. When cold, the piston/sleeve essentially grind on each other.
As the engines wear out, the piston wears down and when at running temp, the pinch is too wide/weak to retain compression and you get blow by which causes compression loss, bad running, flaming out/stalling.
The break-in process mates the piston to the sleeve and the pinch is usually really tight when new, which is why you have to run it kind of rich and take it easy for the first 5-10 tanks as the engine wears itself in. Some take even longer to stabilize/wear in. I've had some be broken in at 1/2 gallon, others at 1 and 1/2 gallons. Just depends on the quality of the components as to how long they take to wear into each other.
Once you clean the top of the piston off, wipe the sides of the piston with some DA and a paper towel, put a few drops of oil on it and gently try to push the piston into the sleeve from the bottom. It needs to be oriented how it would be in the engine, there is usually a front and back to the piston/con-rod. I think the oil hole in the bottom of the con-rod usually faces towards the front of the engine. Anyway, put the piston in the sleeve correctly, make sure it's oiled/not dry, then try sliding it up the sleeve. If you reach the top of the sleeve, it's worn out. If it comes out of the top of the sleeve at all, it's worn out. Don't try hammering it in, just push it fairly hard. If it has pinch left, it won't be easy to push it to the top of the sleeve.
This is a couple pistons/sleeves that have lost their pinch, the bottom 2:
This is how far I could push them into the sleeve after having them re-pinched:
With the right tools, the sleeve can be compressed to get some more life out of it. Usually costs $25, but since you got a new one for $35, I'd just use that if this one is wore out. I get mine re-pinched by rayaracing.com. I just ask for a medium pinch since I use pull-starts. If you don't ask, he does a race pinch which is super tight and requires a bump start box to start.
Stay away from those k/n or paper type filters. They look cool, but they don't keep out the really small/fine dust particles that will kill a 30,000 RPM engine. The HPI big filters are fine, motor savers, OS Engines, traxxas revo big filter are all fine.
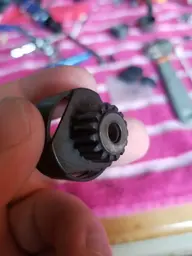
The tool marks on the neck of the sleeve and bottom of the flange may pose a problem with air leaks. That's why you don't want to pry the sleeve out that way. I understand it wouldn't come out, but if it's scratched up where the bottom of the lip on the sleeve seats in the crank case, it will more than likely leak, especially once it warms up, which will cause you a lot of headaches.
I think I covered most of your questions.


 and yes you will have to follow the break in procedure again, but if you use patience and do it right you will get several gallons of fuel thru that engine again...