Navigation
Install the app
How to install the app on iOS
Follow along with the video below to see how to install our site as a web app on your home screen.
Note: This feature may not be available in some browsers.
More options
Style variation
-
Ask questions. Share your HPI Savage knowledge. Register TODAY!
You are using an out of date browser. It may not display this or other websites correctly.
You should upgrade or use an alternative browser.
You should upgrade or use an alternative browser.
J1A1H XXL Torque Monster Buildup........
- Thread starter J1A1H
- Start date
This site may earn a commission from merchant affiliate
links, including eBay, Amazon, and others.
links, including eBay, Amazon, and others.
J1A1H
Well-Known Member
- Messages
- 967
- Thread starter
- #272
I know! They look awesome frddy!
We all know how flex is important in the arms... but i got these at such a steal of a price, i just had to try them.... We will see how it work s out...
But already, I'm trying to think of ways of mounting the sway bars without the usual mounting hole... i may use the second location for mounting a shock?
J1A1H
Well-Known Member
- Messages
- 967
- Thread starter
- #274
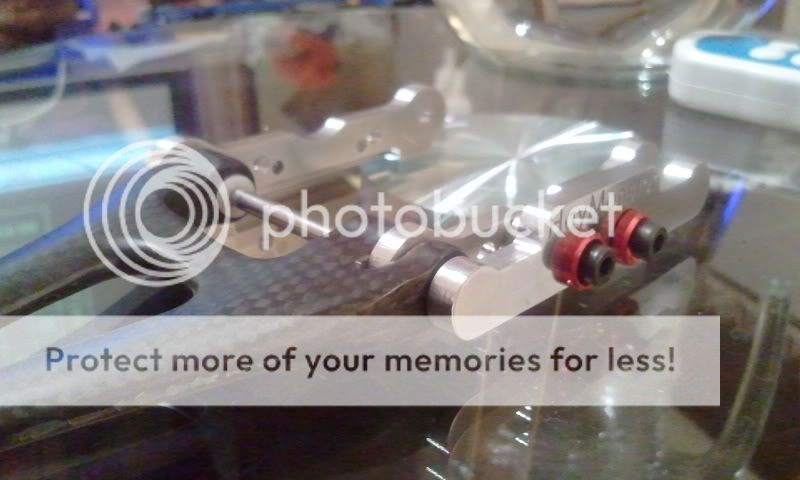
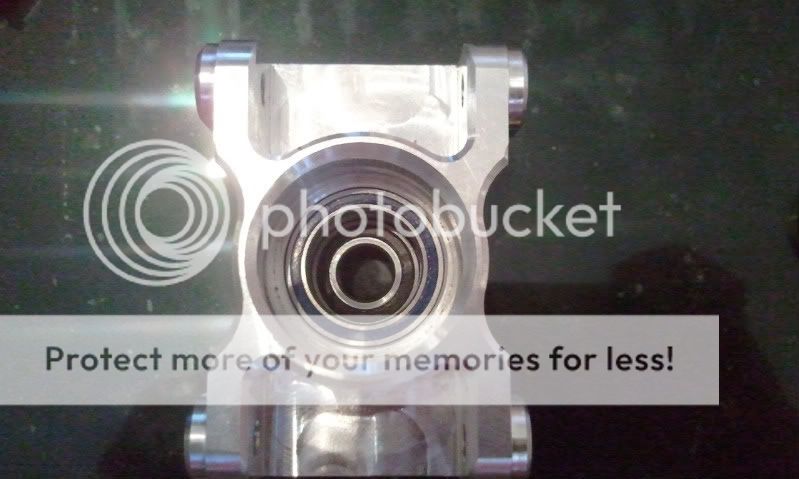
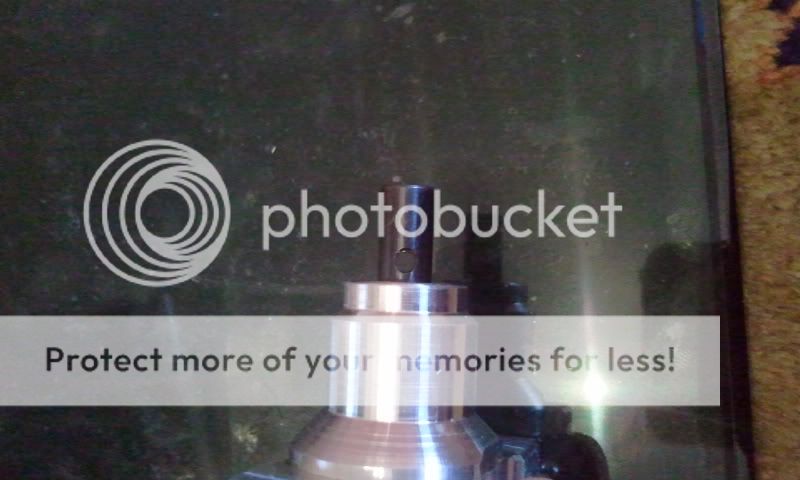
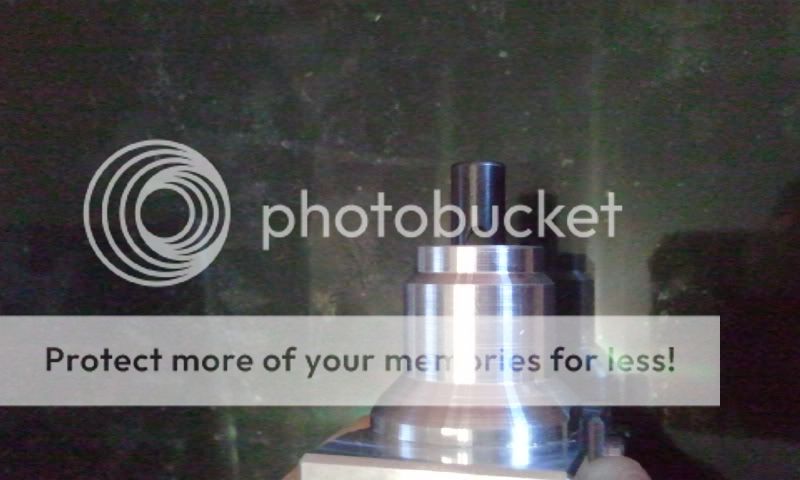
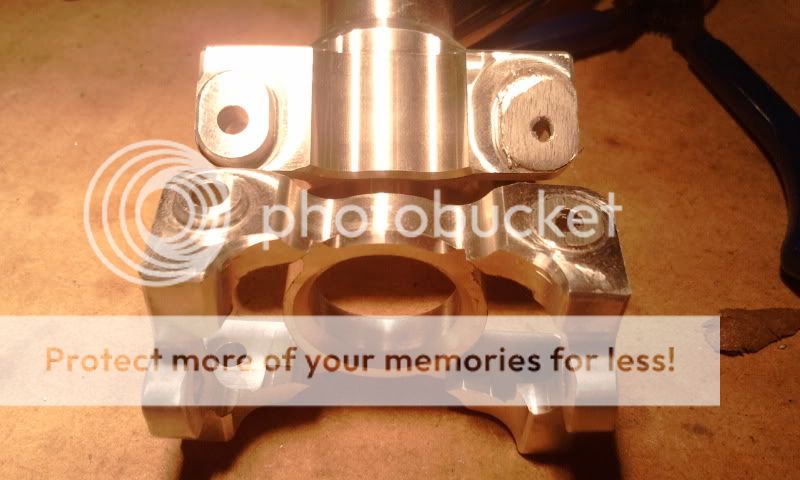
Some Closer Pics of Dejans Mount and How It Works
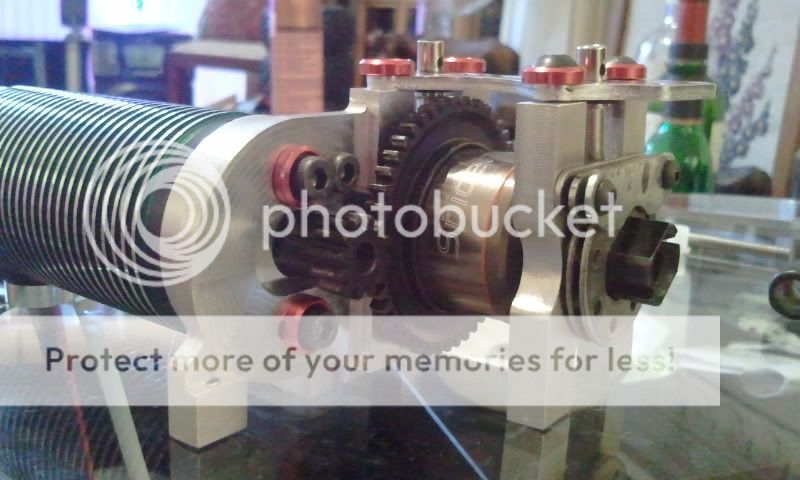
I was originally wanting to use 4 screws to mount the motor spacer to the diff mount. but by the way i have to angle the spacer to get the correct mesh, i can only use 3 screws, as seen in the pic below... I could grind a little more off the diff mount so i can mount a 4th screw... I may give it a go as it isnt much material that needs to come off...

Now i can use my Mech Brakes, and this spacer is very tough... It wont be anodised though, i will keep the alloy colour and have the diff mount anodised red. The top plate will remain silver too. Add a bit of contrast...
I was originally wanting to use 4 screws to mount the motor spacer to the diff mount. but by the way i have to angle the spacer to get the correct mesh, i can only use 3 screws, as seen in the pic below... I could grind a little more off the diff mount so i can mount a 4th screw... I may give it a go as it isnt much material that needs to come off...
Now i can use my Mech Brakes, and this spacer is very tough... It wont be anodised though, i will keep the alloy colour and have the diff mount anodised red. The top plate will remain silver too. Add a bit of contrast...
Mickey
just me
- Messages
- 3,098
- Location
- Renfrew Ontario Canada
looks good josh keep the updates coming
88gtanotchback
SAVAHOLIC
- Messages
- 1,280
looks killer bud, i love the customization factor of your truck, lots of original ideas.
J1A1H
Well-Known Member
- Messages
- 967
- Thread starter
- #277
Thanks guys...
A couple of things to think about....
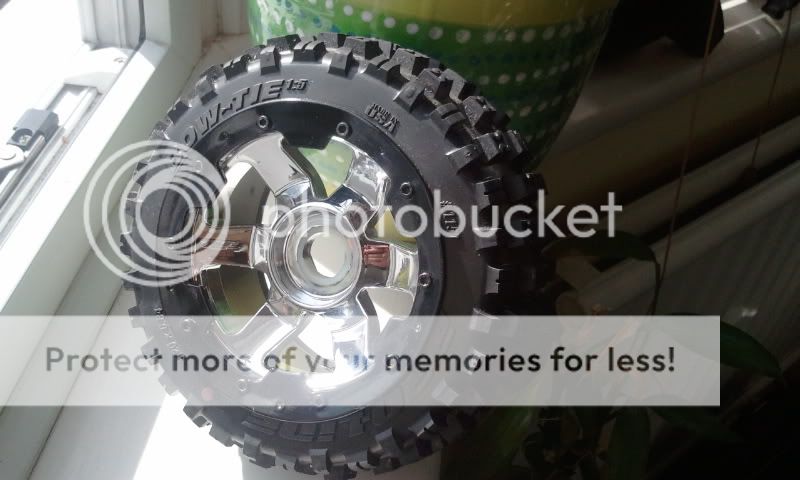
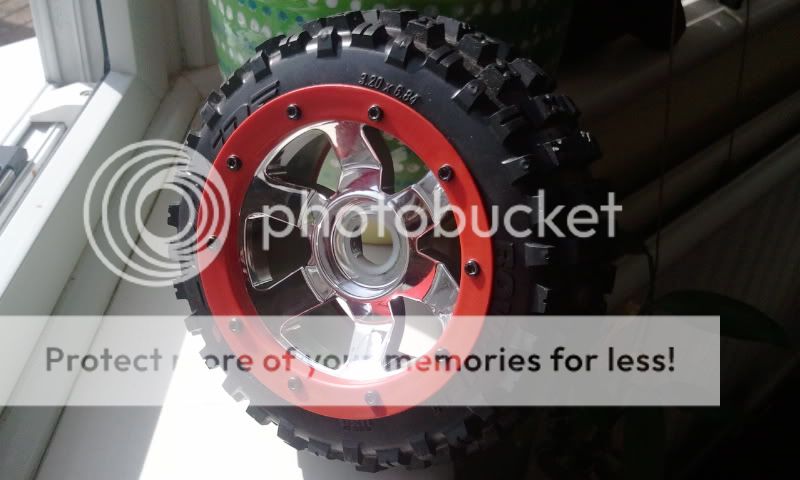
My Silver Back beadlocks came in...
Old
Vs
New
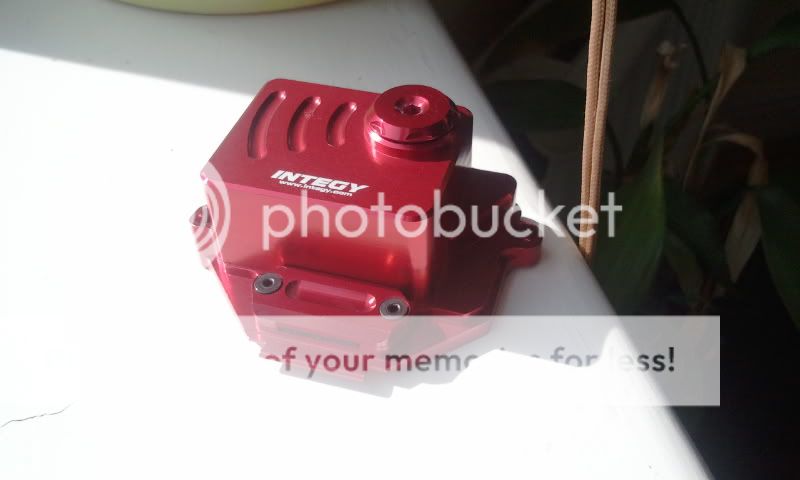
Also.. yesterday, my integy (yes it is the only integy part on my truck) receiver box arrived yesterday. I then asked a few people whether or not it came with a bottom case.... And people said no, and that it just sits on a mini slash chassis. So looks like i need something new made up for it to sit on...CUE DEJAN
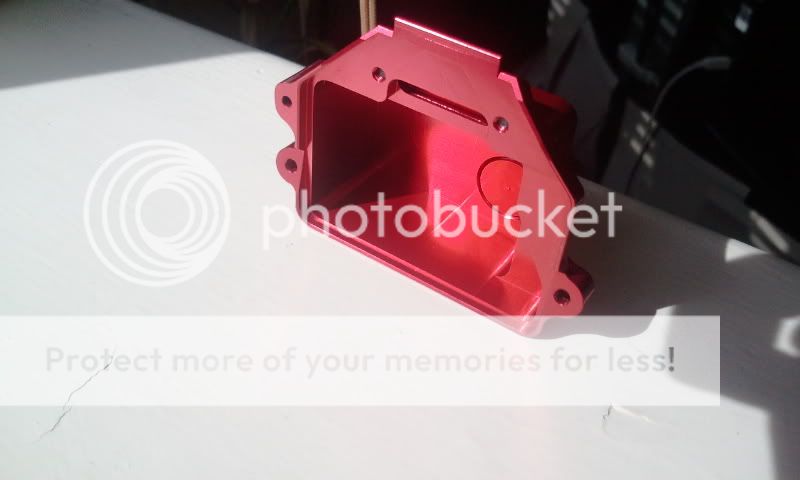
as i need something for my BEC to sit on, i may get a plate for this rx box and BEC to sit on together 😛
A couple of things to think about....
My Silver Back beadlocks came in...
Old
Vs
New
Also.. yesterday, my integy (yes it is the only integy part on my truck) receiver box arrived yesterday. I then asked a few people whether or not it came with a bottom case.... And people said no, and that it just sits on a mini slash chassis. So looks like i need something new made up for it to sit on...CUE DEJAN
as i need something for my BEC to sit on, i may get a plate for this rx box and BEC to sit on together 😛
J1A1H
Well-Known Member
- Messages
- 967
- Thread starter
- #279
Thanks Shaun! Means a lot coming from you...
Ill let you know how they hold up!
I am now very close to sending everything off for anodising.
I just need to prepare what arrived today in the post 😉
After 6 weeks of waiting... New Era messed me around for 5 weeks and then overdrive rc managed to get these out in just over a week!!!!
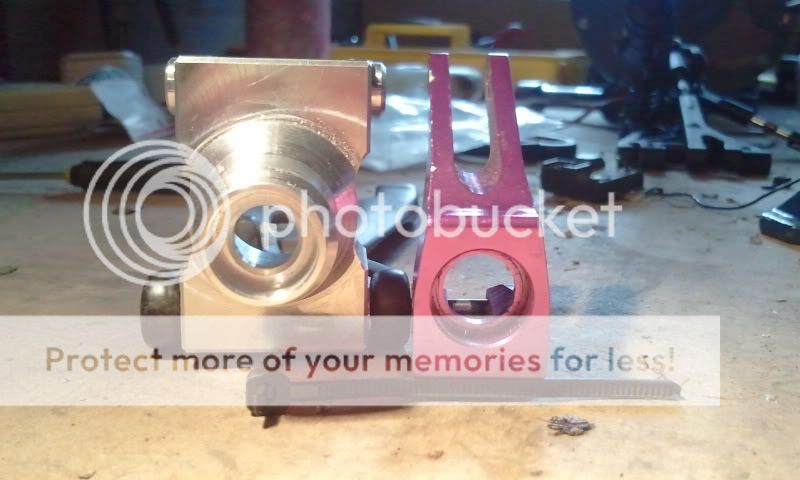
In order to get these to fit with my savage lower arms, i will need to grind down these protruding alloys nubs. Nothing a bench grinder cant fix
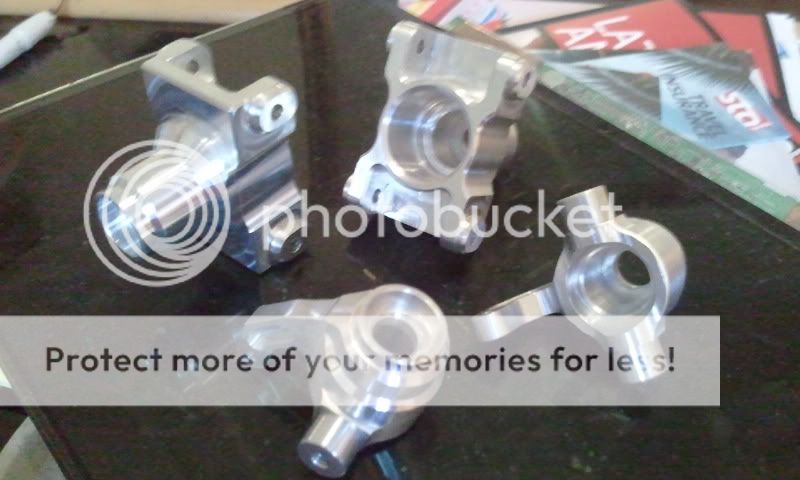
Another reason i upgraded to LST Hubs was because i can utilise 3 wheel bearings which will help the hubs cope with the heavy Baja Wheels.
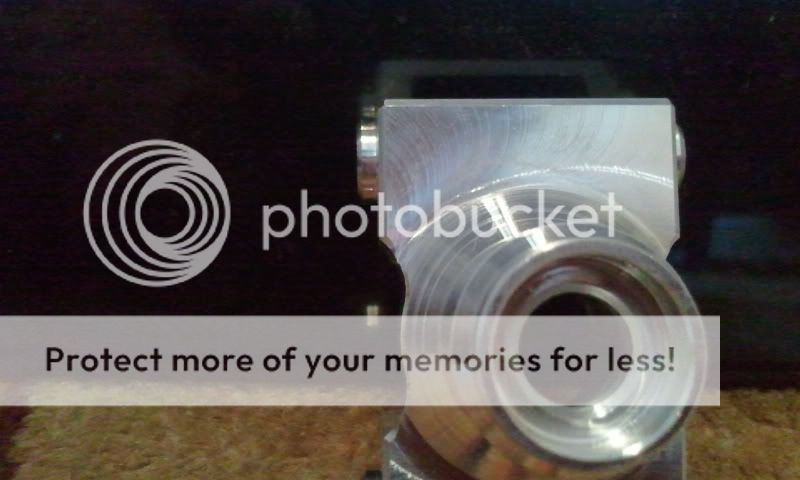
This is how they would sit inside the hub
In order to get the 3rd bearing (centre bearing) to sit snug inside the hub as it wasnt originally deisnged for a 3rd bearing, i will need to wrap the outside of the bearing in a single layer of cello-tape. This is enough to get it to fit snug. Anything thicker wouldnt allow the bearing to sit.
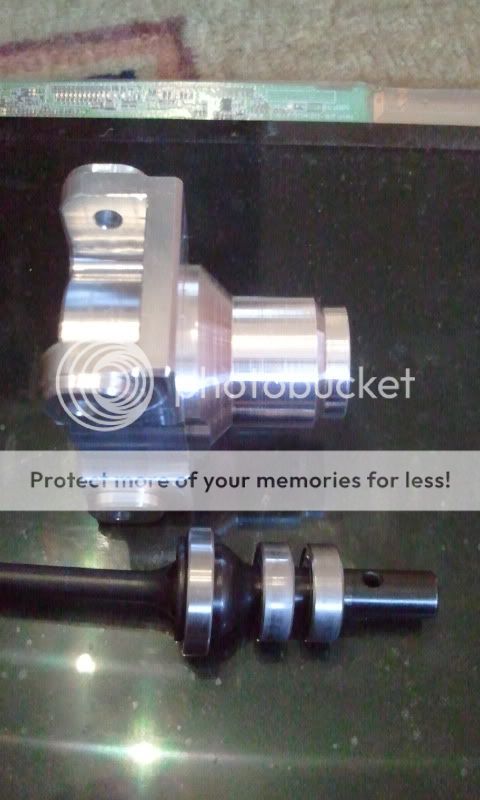
I even tried to see if i could use 4 wheel bearings, but due to the axle increasing in diameter toward the shaft end, the axle cant sit deep enough. So close, but no cigar...
comparison of how where the axle pin sits with 3 and 4 bearings
3 Bearings
4 Bearings
Anyway... i think i have all the alloy now, so i can send this all off for anodising asap.
Ill let you know how they hold up!
I am now very close to sending everything off for anodising.
I just need to prepare what arrived today in the post 😉
After 6 weeks of waiting... New Era messed me around for 5 weeks and then overdrive rc managed to get these out in just over a week!!!!
In order to get these to fit with my savage lower arms, i will need to grind down these protruding alloys nubs. Nothing a bench grinder cant fix
Another reason i upgraded to LST Hubs was because i can utilise 3 wheel bearings which will help the hubs cope with the heavy Baja Wheels.
This is how they would sit inside the hub
In order to get the 3rd bearing (centre bearing) to sit snug inside the hub as it wasnt originally deisnged for a 3rd bearing, i will need to wrap the outside of the bearing in a single layer of cello-tape. This is enough to get it to fit snug. Anything thicker wouldnt allow the bearing to sit.
I even tried to see if i could use 4 wheel bearings, but due to the axle increasing in diameter toward the shaft end, the axle cant sit deep enough. So close, but no cigar...
comparison of how where the axle pin sits with 3 and 4 bearings
3 Bearings
4 Bearings
Anyway... i think i have all the alloy now, so i can send this all off for anodising asap.
J1A1H
Well-Known Member
- Messages
- 967
- Thread starter
- #281
I hope it is!!! i just hope it performs better than it looks though!
Decided to get things moving... Started grinding down the lst hubs to fit in the savage arms... I'm now ready to send everything off...
Cant wait to put all this back together!
Decided to get things moving... Started grinding down the lst hubs to fit in the savage arms... I'm now ready to send everything off...
Cant wait to put all this back together!
J1A1H
Well-Known Member
- Messages
- 967
- Thread starter
- #282
Finally ready for some anodising!!!!
Thought i would take a before shot of all the alloy that is being sent off. I have decided to leave my shock towers and my brace kit silver to add a little contrast otherwise the red would be way to overpowering imo
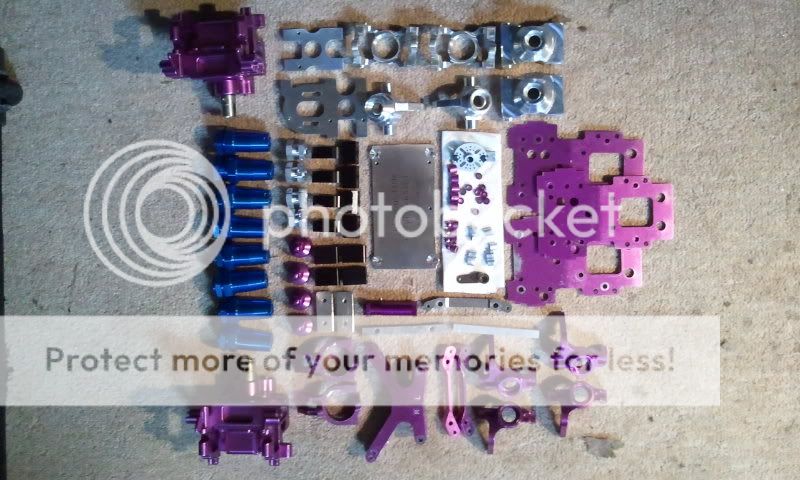
I also took some comparison shots of the LST 2 Alloy hubs and the Suspension conversion kit hubs...
This looks like they will add some weight, but should add stability to this brutal build and should deal with any 60mph cart wheels hopefully #:twisted:
Thought i would take a before shot of all the alloy that is being sent off. I have decided to leave my shock towers and my brace kit silver to add a little contrast otherwise the red would be way to overpowering imo
I also took some comparison shots of the LST 2 Alloy hubs and the Suspension conversion kit hubs...
This looks like they will add some weight, but should add stability to this brutal build and should deal with any 60mph cart wheels hopefully #:twisted:
SwampDawg
Well-Known Member
- Messages
- 501
- Location
- Interior BC
those LST 2 hubs just got me interested...
SwampDawg
Well-Known Member
- Messages
- 501
- Location
- Interior BC
lookin at the pics fred...
ill assume just spacers and the upper arm drops in as per the original.
ill assume just spacers and the upper arm drops in as per the original.
J1A1H
Well-Known Member
- Messages
- 967
- Thread starter
- #286
Yep SD is correct... I got dejan to make me some alloy spacers that work.
I am using a longer 60mm turnbuckle from a hellfire.
But the upper rod can not go through the existing ball ends as they accept a 3mm screw. So i have a way around that 🙂
I will have pics and write ups of how to do the full conversion when i put everything together...
I got a quote from UBER RC in the UK... it will cost quite a lot... Around £60.00+postage. BUT there is a lot of alloy there... They said they usually charge £35 per truck. But i have more alloy than you would put on 1 truck...
I am also getting my RSC anodised but that is only because they are battered from stone chips and I'm selling them off.
J1A1H
Well-Known Member
- Messages
- 967
- Thread starter
- #288
Another reason for the conversion fred, is because i will be using the LST2 CVDs which are the same 5mm thick shafts as a savage.
But i love the idea that they are CVDs! I am also able to run 3 bearings inside the hub (obviously not standard) and will use extra wide hex extenders to push my Baja wheels out.
But i love the idea that they are CVDs! I am also able to run 3 bearings inside the hub (obviously not standard) and will use extra wide hex extenders to push my Baja wheels out.
J1A1H
Well-Known Member
- Messages
- 967
- Thread starter
- #289
Little Update
Look what arrived today
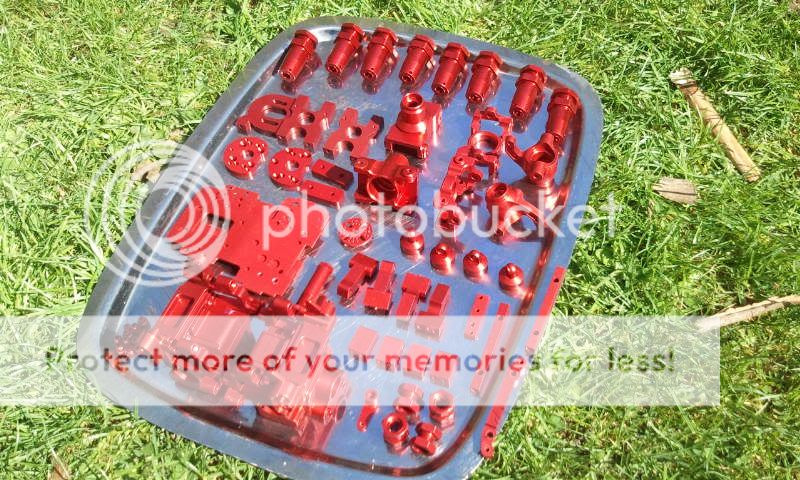

Not exactly the red i was hoping for, but i am still happy with it...
I was hoping for this finish on the integy RX box
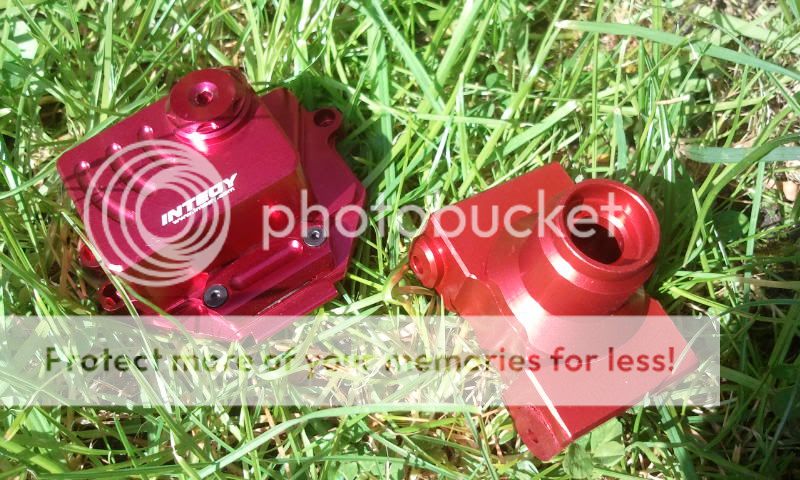
Some of my alloy mounts look a little dull, but i guess that is because i didnt prepare the surface and polish them before the anodising...
Let the build commence:getdown:
Look what arrived today
Not exactly the red i was hoping for, but i am still happy with it...
I was hoping for this finish on the integy RX box
Some of my alloy mounts look a little dull, but i guess that is because i didnt prepare the surface and polish them before the anodising...
Let the build commence:getdown:
tallone09
Well-Known Member
- Messages
- 207
- Location
- murfreesboro tn
The red looks great should turn out good . you take you could wax or polish the powder coat bright up the red maybe so match the other just a thought
88gtanotchback
SAVAHOLIC
- Messages
- 1,280
looks really nice man, cant wait to see it all put together.
J1A1H
Well-Known Member
- Messages
- 967
- Thread starter
- #292
tallon, ill give it a go, but i doubt the polish would help.
I was told that to get the best finish, you need to deanodise and polish the bare alloy before re anodising. A lot of work for something that will most likely get battered very soon haha
I originally thought i wasnt that happy, but it has grown on me more and more, and i prefer the colour... Something different to the usual polished reds you always see... I'm liking the "matt" finish.
I'm not going to be putting too many pics up in this thread, as i will create a whole new build thread from start to finish with this.
So just some teaser pics...
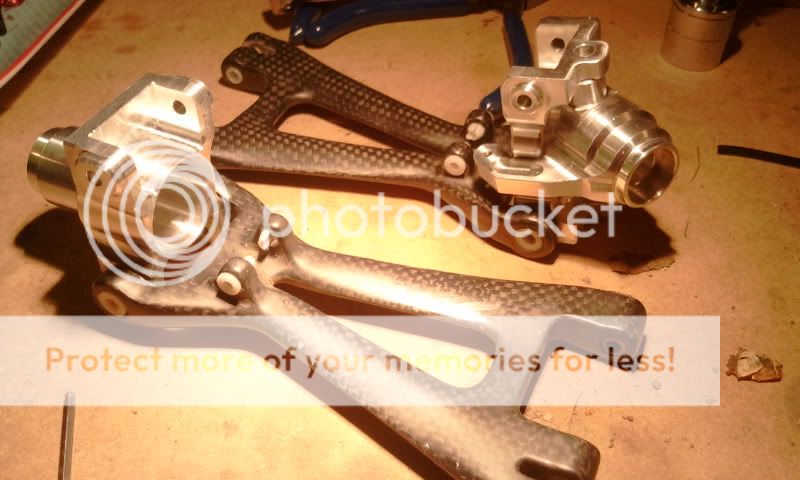
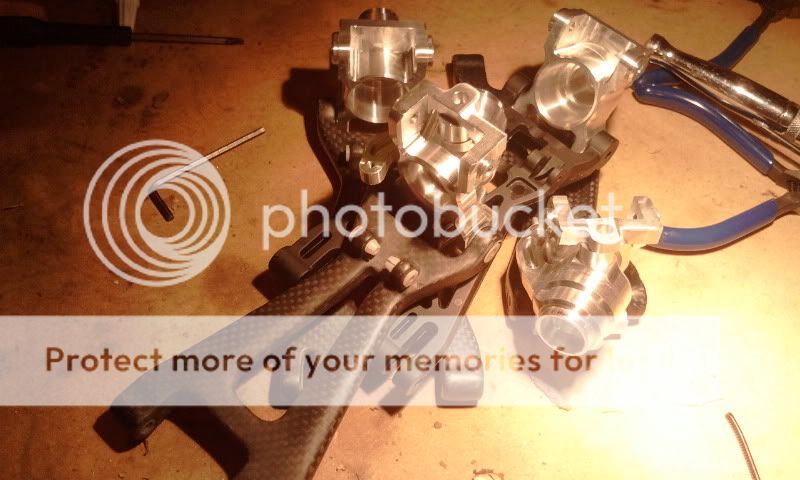
Small Review on Carbon Arms
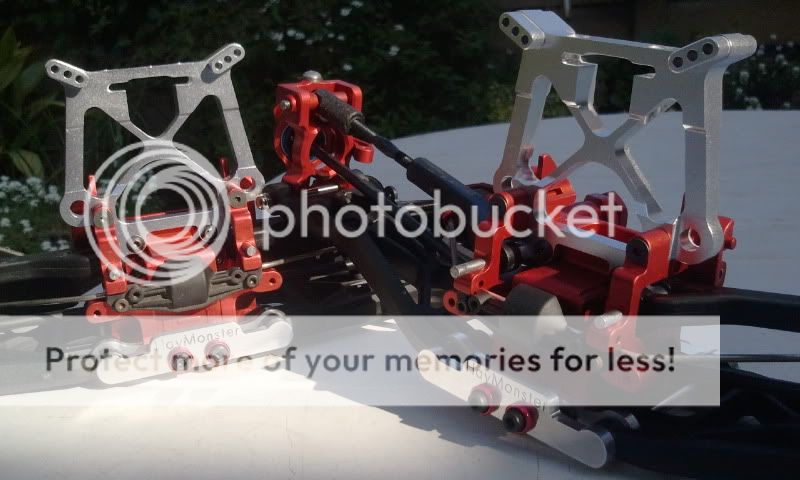
Finding a method to mount my sway bar with the Carbon arms, is proving difficult. There is no original mounting hole...
Mounting the bottom shocks to the arm is also difficult. Plus, i feel there is also a lot of binding. Yes they look really good, and i believe they will perform well offering great rigidity, but i may sacrifice all that and put the stock arms back on...
This will not be a build i can put together so quickly.
I am waiting on little things like shock bolts, and having to customise this and that to make things fit and work...
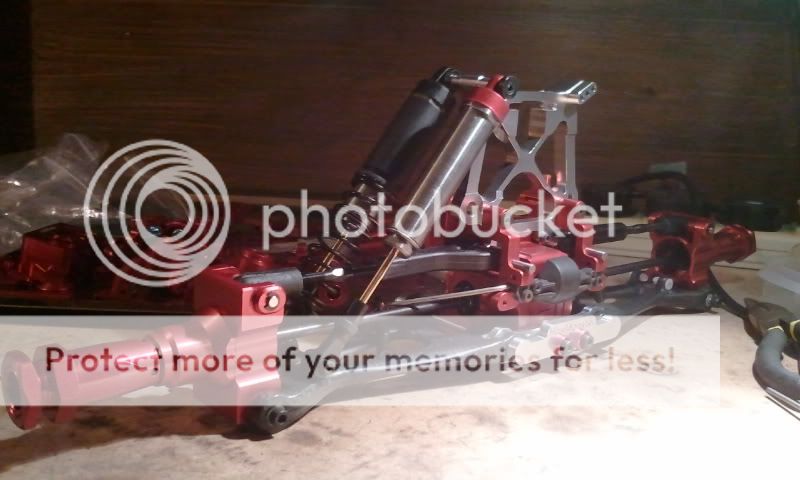
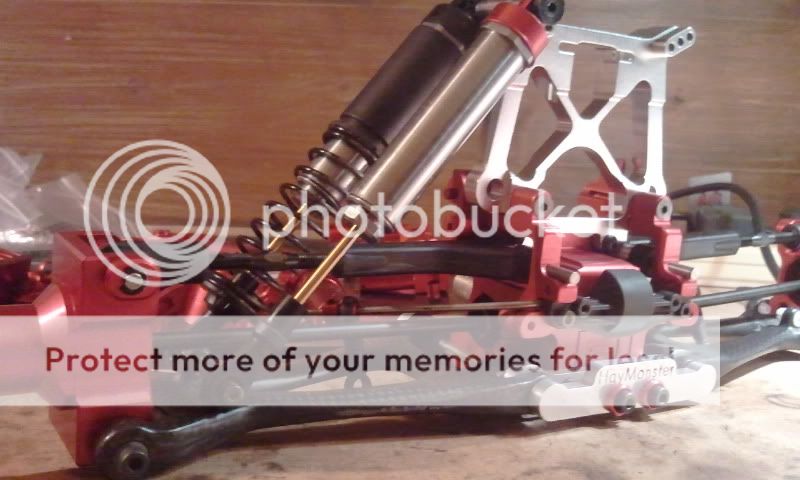
I have decided on using dual Shocks per arm. Utilising only one spring on one shock and the second shock for added damping for handling bumps at speed.
Also one bare alloy shock looks soooo good!
I was told that to get the best finish, you need to deanodise and polish the bare alloy before re anodising. A lot of work for something that will most likely get battered very soon haha
I originally thought i wasnt that happy, but it has grown on me more and more, and i prefer the colour... Something different to the usual polished reds you always see... I'm liking the "matt" finish.
I'm not going to be putting too many pics up in this thread, as i will create a whole new build thread from start to finish with this.
So just some teaser pics...
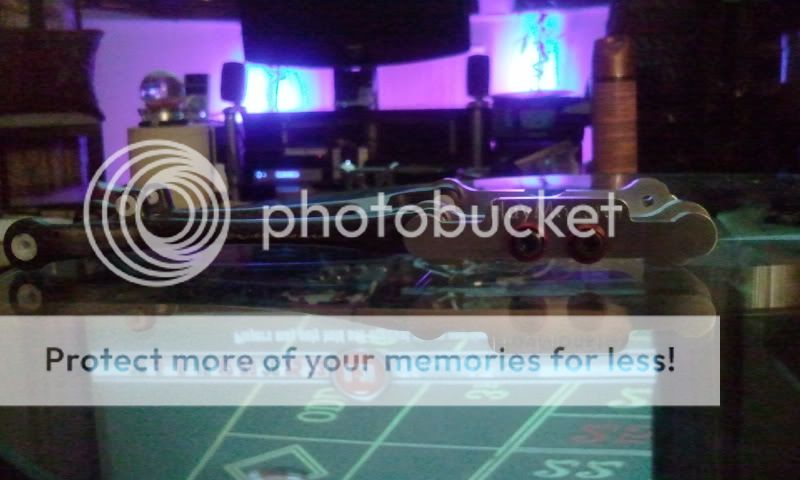
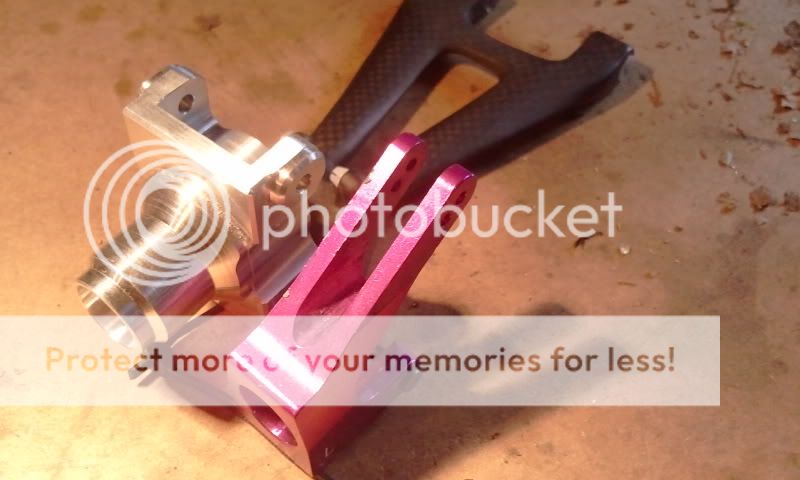
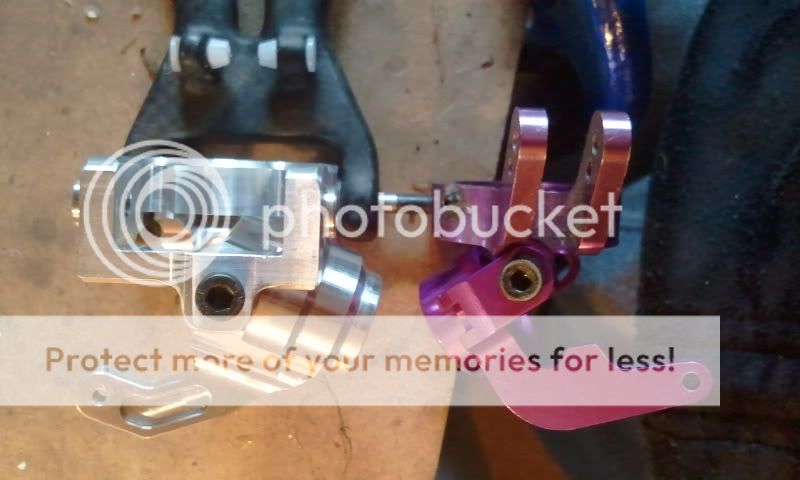
Small Review on Carbon Arms
Finding a method to mount my sway bar with the Carbon arms, is proving difficult. There is no original mounting hole...
Mounting the bottom shocks to the arm is also difficult. Plus, i feel there is also a lot of binding. Yes they look really good, and i believe they will perform well offering great rigidity, but i may sacrifice all that and put the stock arms back on...
This will not be a build i can put together so quickly.
I am waiting on little things like shock bolts, and having to customise this and that to make things fit and work...
I have decided on using dual Shocks per arm. Utilising only one spring on one shock and the second shock for added damping for handling bumps at speed.
Also one bare alloy shock looks soooo good!
Ascender
.....
- Messages
- 297
- Location
- Galloway, Ohio, USA
What are those shocks from, where did you get them, and how much were they? Can you use stock HPI Big Bore shafts and pistons with them? I love the look of those, and if they're cheap enough, I'm gonna grab some...
tallone09
Well-Known Member
- Messages
- 207
- Location
- murfreesboro tn
tallon, ill give it a go, but i doubt the polish would help.
I was told that to get the best finish, you need to deanodise and polish the bare alloy before re anodising. A lot of work for something that will most likely get battered very soon haha
I originally thought i wasnt that happy, but it has grown on me more and more, and i prefer the colour... Something different to the usual polished reds you always see... I'm liking the "matt" finish.
I'm not going to be putting too many pics up in this thread, as i will create a whole new build thread from start to finish with this.
So just some teaser pics...
Small Review on Carbon Arms
Finding a method to mount my sway bar with the Carbon arms, is proving difficult. There is no original mounting hole...
Mounting the bottom shocks to the arm is also difficult. Plus, i feel there is also a lot of binding. Yes they look really good, and i believe they will perform well offering great rigidity, but i may sacrifice all that and put the stock arms back on...
This will not be a build i can put together so quickly.
I am waiting on little things like shock bolts, and having to customise this and that to make things fit and work...
I have decided on using dual Shocks per arm. Utilising only one spring on one shock and the second shock for added damping for handling bumps at speed.
Also one bare alloy shock looks soooo good!
just and idea haven't mess with powder coat to much and look good so far keep up good work
J1A1H
Well-Known Member
- Messages
- 967
- Thread starter
- #297
What are those shocks from, where did you get them, and how much were they? Can you use stock HPI Big Bore shafts and pistons with them? I love the look of those, and if they're cheap enough, I'm gonna grab some...
They are just regular Alloy BB and Plastic BB. The alloy BB is just naked without the spring etc. I'm just running it for increased damping as my spring setup is very stiff.
Thanks for the comments guys
I decided to go back to the stock arms... They are so much better, and i am going to want to bash this hard when it is done, so plastic stock arms FTW!
Ill keep the vantage arms and use them, when i race or something. But for now I'm happy with stock and easier point for mounting my sway bar.
I have loads of build pictures, but will keep all these for when i complete the truck and begin a proper build thread with entire write up and pics.
Here are some more teaser pics


J1A1H
Well-Known Member
- Messages
- 967
- Thread starter
- #300
It was only $8 because i sent him a template of my original product!
Send him a template of what you want made up and he will make it at a discounted rate! But you need to get in there quick otherwise people would have sent their items in and they would have templates already.
They are fairly new so they don't have much and want the work
Send him a template of what you want made up and he will make it at a discounted rate! But you need to get in there quick otherwise people would have sent their items in and they would have templates already.
They are fairly new so they don't have much and want the work