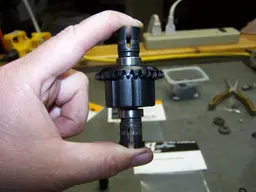
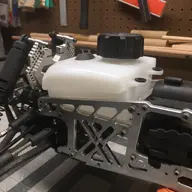
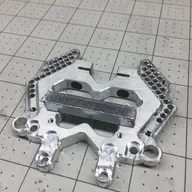
This truck has Vorza modded diffs with hardened internals and the hardened ring gear. The Vorza diff mod gives the benefit of having the same size bearings on both outputs. The reason used to be because the smaller bearing on the stock Savage diffs would wear out faster, also, you had two different size bearing which seamed ridiculous to begin with. These Vorza cups are strong and with the hardened internals, pretty much bulletproof. I don't know what new spec diffs look like but they used to be aluminum with cast internals that would grenade easily. That's why we started using Vorza diffs.
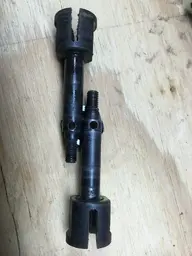
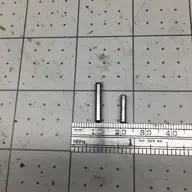
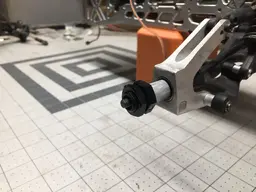
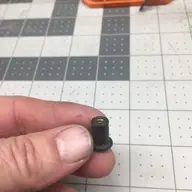
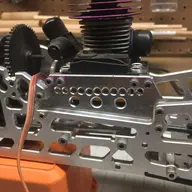
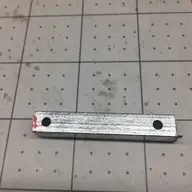
Another Vorza mod on this is the use of the hexs. The axle pin hole is bored out to 1/8" in order to fit the Vorza pins. You can see just how much beefier the Vorza pins are compared with the stock Savage ones. It looks like the newer spec Savages may be using similar hex setups now. Way back when, they weren't. You'd take off a tire and the hex would come off with it, thereby letting the pin fall out because gravity. Then you've invariably lost the pin and unless you were smart enough to have some in a handy tool box, bashing session over. In the fourth picture, you can see how the hex captures the pin which is captured by the axle, so no coming off. The axle spacer and the hex is a tight fit, meaning you have to pull on the axle, push on the hex and bang in the pin all at the same time to get it all to fit, so nothing is just falling out, even with gravity against you. Ah, the good old days of coming up with solutions to our bashing problems...