Project FG

This site may earn a commission from merchant affiliate
links, including eBay, Amazon, and others.
Alex,
Sorry i didn't mention this 🙂. I am using those 1/2 braces as that-braces, and the aluminum plate will go over the top of them, giving the lateral support that is needed. The half braces are there to make room for the servo linkage which kept getting bound up when i place the servo any lower...

As for the rubber mounts, rigjt after we spoke yesterday i added them to both servos 🙂. Thanks for the info or it would have cost me a servo !!!

Bob
 
Few minor updates - pictures to come soon!

I added the rubber isolators to the steering servo as well as the throttle servo, just to keep things from vibrating to pieces as Alex pointed out. I also grabbed a set of linkage pieces from the LHS to make things even more sturdy (the linkages in the pictures are ones I used to make a mount for my air cleaner to keep it out of the spur gear, so they prolly wouldn't hold up well to the task of steering without separating).

Remember, my receiver is currently installed in a radio box on the outside of the rear shock tower - well I am not too crazy about it being there and not taking a big hit one of these days.

G_Photo_21.jpg


I started fabricating an aluminum mount that will go on the other side across from the steering servo inside the TVP's that will hold the receiver in place and in a much safer position - the aluminum angle will act like a skid plate on the bottom protecting the receiver box from anything that might come up from the bottom. I like this setup better. since it helps keep the weight low (it doesn't weigh much anyways). Also, this will be made from the same 1"x1" aluminum angle (I am getting my money's worth out of this $3 or so piece!). Another member mentioned that the aluminum as a complete box may cause interference, so this will be just a basic tray to keep it in place and will me mounted to the TVP to keep it from bouncing around. I already have padding inside the box to minimize vibrational damage, so I should be good to go.

With all the moving around of stuff, I started making my throttle servo mounts too. Considering the amount of work I am doing with aluminum, and some of the things I am planning on doing with my up-coming 1/5 scale conversion, I am seriously considering a table-top band saw from Lowes - $100 is a good price considering what I can do with that once I get it. Since there will be a lot more custom aluminum work on the 1/5 scale, this is likely something I will pick up at bonus time.

I will get some more pics tonight...

Bob
 
Well, last night I got the rest of the goodies installed. The plates arrived from OnlineMetal.com, and they are awesome - well as awesome as I asked for, seems I messed up and ordered 3 7/8" x 5" plates instead of 2 7/8" x 5, but that's OK, I have a hack saw and I know how to use it 🙂

So I started off removing the temporary throttle servo I installed the other day to make room for the tank plate.

steering_conversion3.jpg


Once that was done, I took the plate, and cut it to size, drilling holes in it for the steering braces. Alex, I think this is the part I didn't explain the other day - this plate will give it the lateral support that the brace is missing since I cut it in half. Then I used another old motor mount brace to support the rear of the plate, trying to keep the plate as low and level as possible.

photo5.jpg


This worked out real nice - I just had to add one washer on each side on top of the steering bellcranks to make a little more room for the steering linkage. The results I think were pretty good:

photo6.jpg


NOW ALL I NEED IS MY *&*&#$*^**#$*( TANK! (grrrrrr):sniper:

Ok, with the plate done, I moved to the back to make a mount for the throttle servo. This was easier than I expected - again, using the 1x1 aluminum angle. I measure a piece big enough to stretch across the opening and use the existing holes for the OEM tank mounts, and notched it for a servo:

photo1.jpg


I thought this was too clunky, and when the pull-start line droops, the rubber boot rubs on the edge of the aluminum bracket. So I modified the plate a bit to make it more esthetically pleasing, and shortened the ear of the mount so that when the servo is mounted, the rubber boot rests against the smooth side of the servo, protecting the boot and the line inside!

photo4.jpg


Now I need to just iron out the wrinkles with the throttle/brake linkage, and we are good to go -- OH YEAH AND WAIT FOR MY &*&*^#$^ FUEL TANK...

Bob
 
Last night I put the last bits together to get this thing done in time for tomorrow's bash - was up till 2 am doing it, but its done at least!

After finally getting the tank, I found an interesting problem - the tank was longer than the 5" plates I had ordered - so I needed to add a little diving board to the end:
G_Photo_22.jpg


From there I added the mounting posts. I don't know if you can see it well, but I drilled the posts off-center on the top, and centered on the bottom - so that the posts could be rotated to make subtle changes to the width of the mounting positions to move the tank a bit side to side, front to back, etc.

G_Photo_23.jpg


While doing all this, I found out something pretty cool, actually. The mounts that I was fighting with in the rear at the trans were not necessary. The 1/8" plate was thick enough to be rigid, and the fact that it rested on the trans and front bulkheads, with mounting screws into the bell-cranks, made the platform ummovable. And I tried! I am going to keep an eye on this, but if it works - that would be AWESOME. I left the bulkhead brace on the back of the plate @ the trans for rigidity, but also if need be I can put the screws into the sides through the TVP's - the holes are already there, but I wanna see how it holds up 🙂

When mounted, the tank sits low, but I would like to figure out at some point if I can make it even lower. 250cc is a lot of fuel that can throw off the center of gravity when sloshing, so maybe if I get bored sometime over the winter I will try to come up with another idea here, but for now, it will get me ready for Sat's bash!

Completed (missing pressure line off muffler)

G_Photo_25.jpg


I will beat on her like a government mule tomorrow and let you all know how well it worked out.

All told, the overall project was fairly inexpensive, but mostly because I have the means to make my own parts. Here's the breakdown:

1) plate aluminum - $5
2) 1x1 aluminum angle - $3
3) 3/8" diameter aluminum round stock - $2
4) Ofna tank - $14
5) RC10GT Receiver box (not arrived yet) - $7
6) Traxxas battery box - $10 (I had one, but if you had to buy one...)

G_Photo_26.jpg


When you add in the misc bolts and screws that I had on hand, this whole thing should cost no more than $45 or so - not a bad deal when you consider how much more consistent the motor will be without the mid-tank lean, as well as almost doubling your run time (this is important to me, since I run a 4.6HO - thirsty little devil). I did decide to add the RC10GT receiver box, but it did ot arrive in time for the bash so everything is all wrapped in balloons for water-proofing and ziptied out of the way for now.

Comments welcome!

Bob
 
I have had many of those 2-3 am nights getting my truck ready for a bash or race. I am going to have one tonight. Than up at 6 am to go bash.

Come 9 am when you fire it up it is all worth it though.
 
Feedback on the shakedown run - NICE.

The truck needed to be retuned, and I really should have swapped out the spur gear for something bigger, but all in all she ran well! The weight balance was quite good, and she flew pretty much flat - it was a blast! The biggest issue was the nut behind the wheel LOL

The only real issues I ran into were some screws working loose - they were replaced with nuts and bolts instead of the coarse thread screws used initiallly - once all tightened back up, all was good!

Bob
 
OK, now that Thanksgiving is over, I was able to get a little more done on the Savage last night.

The last time I was out bashing with Alex, AJ, Ben, etc, I managed to destroy the T-Maxx battery box I was using behind the motor of my XL. Before you rip on Traxxas, it was a pretty bad hit - broke the rear shock tower and two shocks and in all that the box got hit. I was able to zip tie it back together to keep bashing, but it needed a redesign.

In the old design, the receiver was in a balloon and zip-tied to the inside of the TVP up front - done pretty much to get the truck in running shape for the bash. Now that the season is pretty much over, I can revisit it.

So I removed the RX and batter box, and pulled out another Traxxas RX box I picked up early in the process. Initially I had the RX mounted to the back of the shock tower:

G_Photo_21.jpg


I didn't like this layout, and since I ended up hitting the shock tower, it definitely needed to be redone. So I pulled the box out and redid it.

I added a Spektrum SR3300T receiver, power switch, and charge receptacle all to the one box - this will ge mounted behind the engine between the TVP's:

%5BUNSET%5D.jpg


%5BUNSET%5D.jpg


It is a tight fit, but it all fits nice and snug. To cushion the RX, I have it mounted in the box on velcro - holds it in place, but also provides some shock and vibration protection. With the bottom in place (not shown) it all stays nice and snug. The switch is mounted on the top and the charge receptacle is mounted in the side:

%5BUNSET%5D.jpg


This is mounted to the plate the old T-Maxx box was attached to. As for the battery, I mounted that on a plate mounted to the outside of the rear shock tower. I will get a pic if anyone needs one.

More to come. I need to install my 3-speed trans and put the motor back in then maybe I can drive it again 🙂

One truck done (Hellfire), 4 more to go 🙂

Bob
 
Some additional information I left out in the previous post:

The receiver box is mounted behind the engine here:
%5BUNSET%5D.jpg

It is actually farther back than in the picture, to keep it away from the exhaust mmanifold. If it gets too hot, I can put a piece of thermal barrier there to keep the RX box from becoming a little oven or have it start melting.

As for the Rush battery box, I used a piece of aluminum to make a mount that attaches to the bottom two screws on the shock tower running up along the tower. Then I used two screws in the existing holes to attach the battery box to the aluminum plate.

%5BUNSET%5D.jpg


One thing I did different than I have seen in other posts is that I added a n additional screw to the mix - The Rush battery box is nice and small, but the existing mounting points are basically a hing - there is nothing else that will support it in a crash, etc. The weight of the battery in the box then becomes a pendulum - making it likely that the mounting tabs could break off in a crash.

%5BUNSET%5D.jpg


What I did was I added an additional screw to the top of the box to hold it to the aluminum backplate. Two problems with this: 1) there is NO room in the box for any screws to protrude, or the battery box won't close and 2) the back of the battery chamber is not flush on the same plane as the mounting surface. I used a countersunk screww and sucked it all the way down flush with the inside of the box, used a locknut on the other side of the plate to act as a spacer, and then through the alum plate. I had to do it off-center because I forgot to look, and the original hole ended up hitting the tower... Since it is more for support than load bearing, off-center should not be a problem.

I have some motor changes coming soon, so everything is gonna get all mixed around - more to come soon!

Hope this helps!

Bob
 
Well, been a week or so, and I have done a ton of things to the truck 🙂 Might as well get them down.

I picked up a used rig off Fleabay, had a ton of goodies, so I got to putting them into my truck 🙂

%5BUNSET%5D.jpg


%5BUNSET%5D.jpg


%5BUNSET%5D.jpg


%5BUNSET%5D.jpg


%5BUNSET%5D.jpg


%5BUNSET%5D.jpg


I upgraded my steering servo to a HS-945MG, and the throttle to a JRz590 to replace the HS-645\SF-1... Got them for a real good price, so what the hell 🙂

I also pulled the front and rear suspension off and swapped in the ones I got off the donor truck. I have no intentions of racing, so I don't care all that much about weight, so I put in the aluminum assemblies from the donor - housings, diff casings, bulkheads, shock towers - the works. Surprisingly, when I held one in each hand, the new ones were only slightly heavier - I figured it would be more (I will put the rest of the aluminum parts on Stupid Truck like the bumpers, skid plates, all the needless crap)...

Anyways, with the new shock towers came Hellfire shocks - they are shorter than I would like but they'll work for now - I like the lowered stance but need to figure out suspension travel at some point.

%5BUNSET%5D.jpg


she looks a lot better with the XL top than with the 25 one for sure!

%5BUNSET%5D.jpg


More coming soon!

Bob
 
Last edited by a moderator:
I must agree it looks sweet that low. Nice to see you have some better tires on there now too.

By the time we all meet up again to bash we aren't going to recognize each other's trucks.
 
OK, time to get back to work - gotta fight off the winter blah's!

So, I got the donor truck off eBay, and tore it down, but there were a few more things I wanted to do to make it better. So I tore it down AGAIN 🙂

The donor truck came with CVD's, but they were 25 size axles... while I like the CVD's because they eliminate (or minimize) the binding of the axles, but they are smaller and I can't use XL outers. The next problem I found was that if I wanted to use the aluminum housings, I could not use XL diffs - the outdrives didn't fit through the holes in the sides of the housings. Yes, I could use the plastic XL housings, but then I could not use the shock towers with the extra holes... so I decided to modify the housings to make them work.

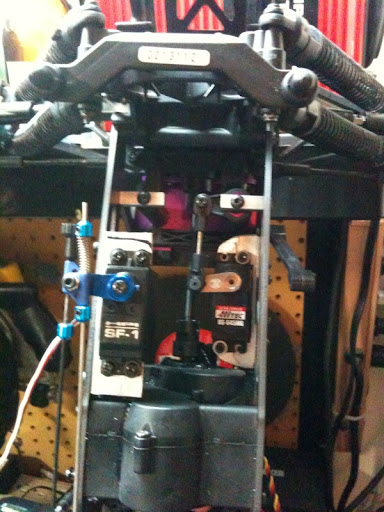
To get them XL diffs to fit, I had to drill a hole in the side of the bulkhead that would allow me to gain access to the diff bolts. This allowed me to assemble the diff inside the housing - not a FAST thing, but it worked.

%5BUNSET%5D.jpg


As you can see, I JB Welded a nylon locknut into the hole I drilled, and this allowed me to reseal the housing by putting a grub screw into the nut to keep out dirt, etc but if I need access, I remove the screw and I can disassemble the diff as needed. GOD I hope I don't need to 🙂 Since from a bashing perspective this is not something that can be swapped out fast, I have an XL bulkhead in the toolbox just in case.

Then I got a phone call from my R/C parts (drug) dealer 
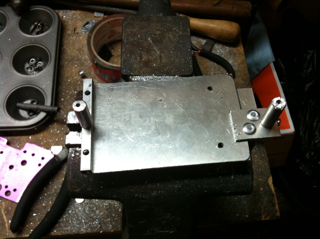
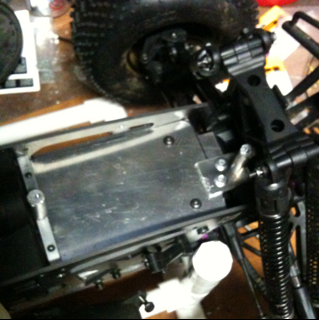
🙂 He was looking to get rid of some FLM parts, so I ended up picking up a set of FLM LCG TVP's, servo plate, etc. Not one to leave it alone, I picked up the servo mounts, motor mount, etc (still looking for the skid plate if anyone knows where I can get one in stock), threw it up on the workbench and started tearing it down AGAIN.

%5BUNSET%5D.jpg


The new TVP's are NICE, but shorter than the XL TVP's I had before (those are going on the truck my son is going to build) so the top won't fit. While I was up visiting my parents, I grabbed a Dodge Ram body, and did a crappy paint job on it (dammit! but it is not too bad for my first body) and will use it on the build when it is done.

%5BUNSET%5D.jpg


I have a bunch of RC's, and I am tired of having to have different rim sizes for the different trucks, so since I have a TON of 23mm rims (they came with the donor truck mentioned above), I decided to set up my vehicles to all be able to swap tires amongst them. The blue Integy 23mm hubs are so-so at best, so I wanted to upgrade them to something beefier. In order to use the larger sized hub conversions, I needed to also swap out the outers - GAH! the hub conversions are too deep (they are actually for a Hellfire). So I ordered a set of XL extended outers, and I am going to machine down the spacer so that the hub adapters fit - then I can use Hellfire sized adapters on the Savages and my Hellfire - and if I stick with 23mm, I also have 23mm adapters for the Baja - but that's another story 🙂

%5BUNSET%5D.jpg


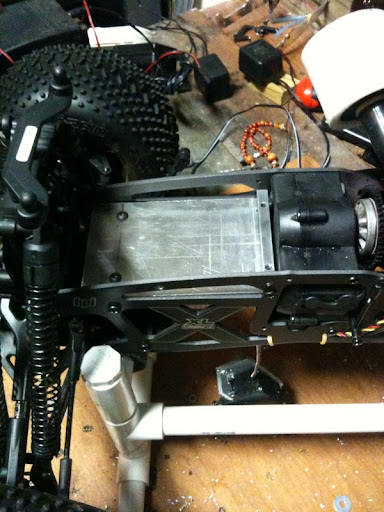
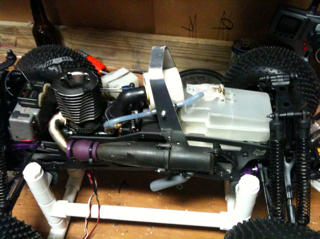
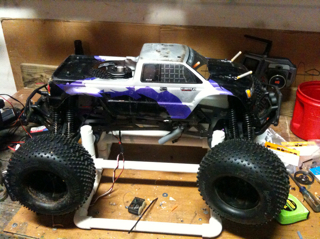
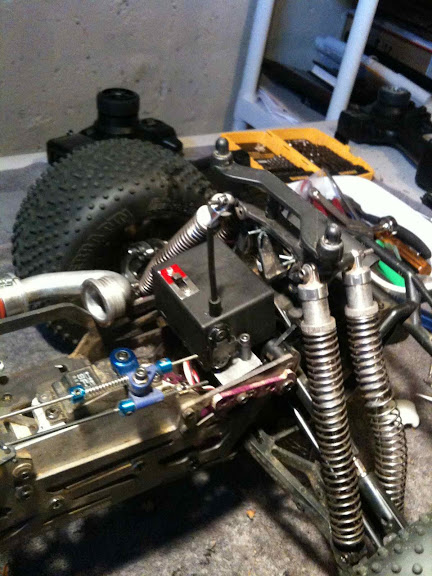
So I started putting it all together - and WOW is this WIDE:

%5BUNSET%5D.jpg


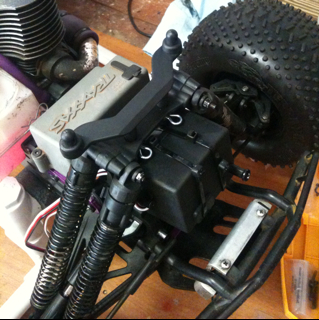
This is my truck next to a bone stock 25. I have the extended outers, and offset rims and that is making me WIDE - more stable, but I worry about turning radius. In the pictures I have Integy rear hubs, but they are going on my son's truck (I bash hard enough to break at least 1 or 2 carriers every time I go out LOL - so they are better than the standard plastic ones). To address the Integy quality concerns AND the possible turning radius issues, I ordered a HPI RSC kit (should be here today, actually). Once that arrives, it's going in PDQ 🙂 Oh, and the Integy alum upper arms are on the build only because I couldn't find my other set of XL uppers (I found them and they are on there now).

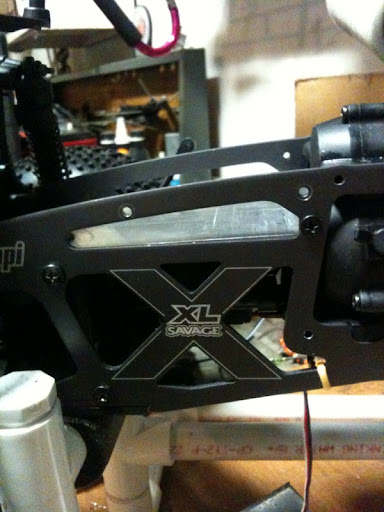
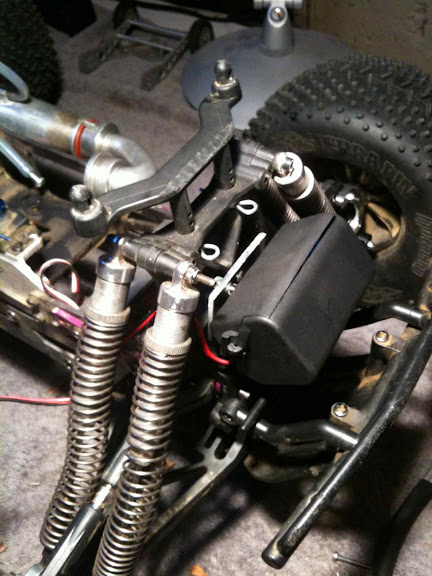
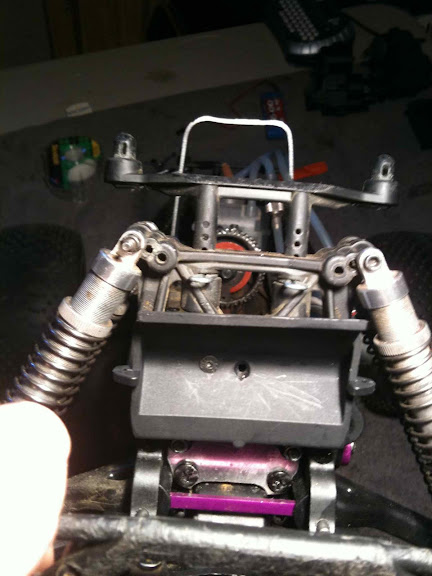
Here are a few more pictures:

%5BUNSET%5D.jpg


%5BUNSET%5D.jpg


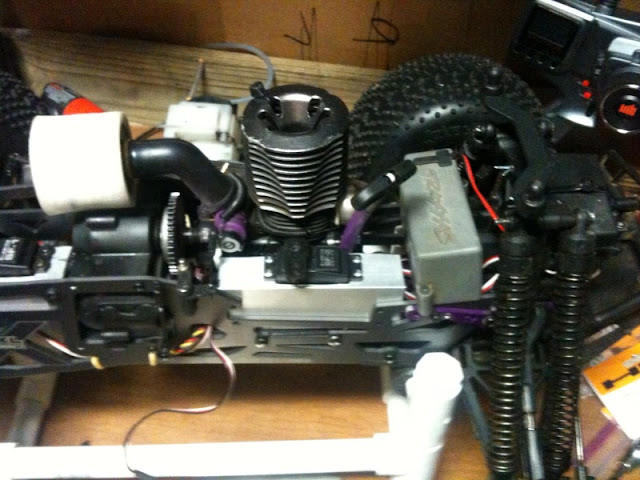
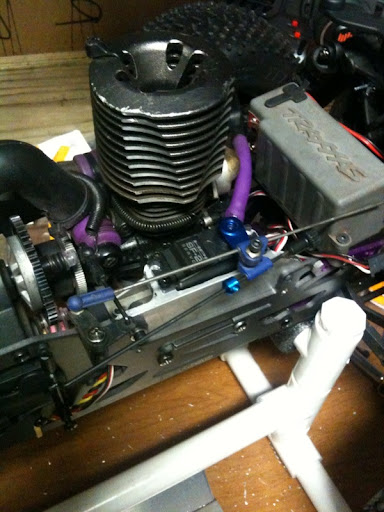
And here is an EARLY mock-up - the body will be lower (in the pic, it is hitting the cooling head, so once I have the final fit, I can cut the body to allow the head to sit through the bed of the truck).

%5BUNSET%5D.jpg


Last things that need to be done:
  • Re-install the motor (Picco .27)
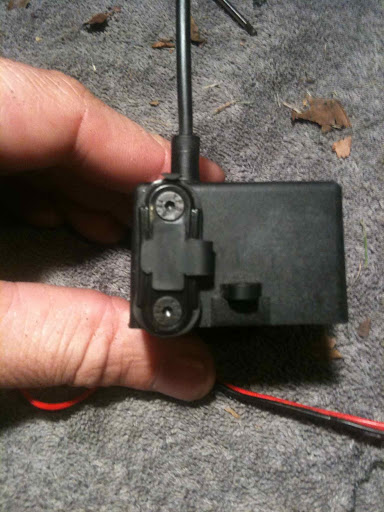
  • Fabricate new servo and RX battery mounts
  • Re-machine the outer axle spacers (need to shave about 1mm off each)
  • Re-assemble front end
  • Fabricate new mounts for the 250cc tank on the FLM servo plate (just needs new risers, my old ones are too short)
  • Install RSC and adjust as necessary
  • Mount body
  • Figure out what to do about those god-awful ugly yellow rims (tires are already glued, so dying is out of the question for now)
  • GO BASH

Comments welcome!

Bob
 
Looking good man. You get special upper arms with the rsc so no worries there. You will need to do a little more custom work to make the rsc work with the alum bulks but I can help with that if you need as that is what I am slowly working on 2 min's every week.

Nice to see my old stuff put to use again.

And yes that is wide and take it from me you will not like it.
 
Yeah, well I just want to get ONE vehicle done - they are all torn apart right now.

The only ones together are the ones the kids use.

What needs to be done with the upper mounts?

Bob
 
Well, I got the bulk of the truck done - woohoo!

I am jammed up waiting for a set of XL rear axles, and I need to mount the RX and battery, but then she is ready to go out for a shakedown.

I have noticed that the RSC steering is pitiful. I need to take it for a spin to see how bad, but it's clear that I am going to need to shave down the steering stops - I got spoiled with the clearanced stock arms 🙂

Getting the RSC suspension upper mounts installed was also a pain in the tail - the aluminum bulkheads don't have the pockets the plastic ones do, so it was necessary to clearance them too 🙂 They are in and things are working well so far 🙂 We'll see after the shake down run.

Looks like the last bits I need will be here tomorrow - hopefully I will have more good news tomorrow!

Bob
 

Latest posts

Members online

Back
Top