So after a week of questions, sourcing parts and spending way too much money on little pieces of plastic and alloy I have got enough parts together to at least make a start on the rebuild.
The original 25 was put away 13/14 years ago and left in a cupboard in the garage - it was never meant to be put away for so long but that's life I guess. Two kids later - its time to try and get them interested which is where the inspiration for this build came from. 3 weeks ago I had no thoughts of ever returning to RC!
The plan is to rebuild the 25 - basically upgrading everything to XL spec, extended chassis, upgraded transmission components - diffs etc. suspension, .32 engine and more. Most of the major parts have been sourced off the markets but a new suite of bearings, o-rings, shell and various other parts are being installed new. There will be some self made mods in the build - nothing too great, don't have the tooling to push any boundaries. I will need to make a mount for an Arrma wheelie bar, maybe a rear spoiler and I need to flush mount a LiPo cut off switch in the radio box. I will build this out with the stock .25 before replacing with a .32, I want to make sure I can get a solid Savage put together before smashing a high power nitro in there and going through tuning - chassis etc. first get it right then drop the new engine in. I still don't know if the .25 will fire - it looks clean but not got that far yet so it may be straight in with a new .32 - time will tell!
A few bits have arrived, enough to make a start on improving the look of the chassis and installing the cut off switch in the new radio box.
Apologies for picture quality - these first images are off a Honor 8 Pro in poor lighting but will have to do until I reclaim the garage from the spiders!
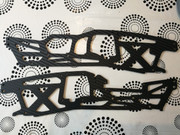
The TVP's were purchased off E-Bay and while straight were a little scuffed but for £30 delivered they are as expected: Pic isn't great but too late to get another!

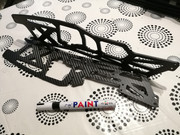
I found a carbon fiber vinyl sheet in the loft leftover from an old PC build, the 3M adhesive was still good so thought I would see how it looked. Just enough to cover one side of each TVP plate:
An hours work and to be honest the finish looked pretty good. I've no idea how long it will last but decided to get another sheet off Amazon for a few quid and finish the other sides as well. As its not permanent, its not much effort to pull the TVP plates off and replace etc. Certainly looks better than they arrived. The edges were finished off with an oil based 'paint pen' inside all of the cut outs and main frame edges.
Finished TVP's
The TVP's will be replaced if the 'right' ones come up for sale on marketplaces - for now they will do just fine and allow me to get the rest of the build started.
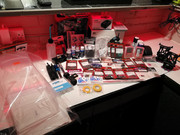
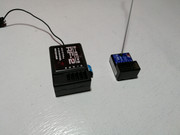
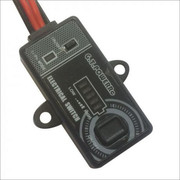
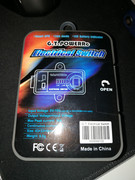
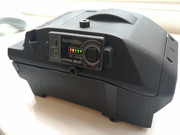
Received a large delivery from Wheelspin this morning with loads of bits (will post up the collection tomorrow) including the new radio box (XL) and the receiver cut off switch. The switch has a LiPo mode which cuts power once the source voltage drops below 6V preventing damage to the battery:
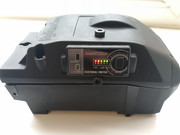
Set to work with a craft knife and file to make a cut out for the switch in the space preset for the HPI battery meter. Ended up with this:
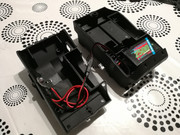
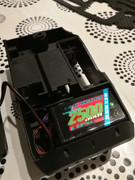
I measured the space for the 2500mah LiPo on my old Savage radio box. I am very fortunate but the new battery JUST fits in the XL unit - Its a 1mm either way and it would not! :
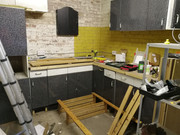
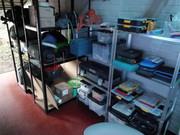
That's it for today's progress - Have tomorrow and Friday booked off work to clear out the garage and deal with a leak in the roof. I want to reclaim my 'workshop' from the spiders - it is infested... I am prepared with a spider nuke bomb or two... The misses won't put up with this on the dining table for much longer so I have to get it done and move in there. Also makes it much easier to hide deliveries - and there are so many coming at the moment she won't believe the 'yeah only cost a fiver' for so long...
So it will be the weekend before this continues, hopefully in the garage and by which time the last remaining parts should be here.
Thanks for reading!
MooGoCow!

The original 25 was put away 13/14 years ago and left in a cupboard in the garage - it was never meant to be put away for so long but that's life I guess. Two kids later - its time to try and get them interested which is where the inspiration for this build came from. 3 weeks ago I had no thoughts of ever returning to RC!
The plan is to rebuild the 25 - basically upgrading everything to XL spec, extended chassis, upgraded transmission components - diffs etc. suspension, .32 engine and more. Most of the major parts have been sourced off the markets but a new suite of bearings, o-rings, shell and various other parts are being installed new. There will be some self made mods in the build - nothing too great, don't have the tooling to push any boundaries. I will need to make a mount for an Arrma wheelie bar, maybe a rear spoiler and I need to flush mount a LiPo cut off switch in the radio box. I will build this out with the stock .25 before replacing with a .32, I want to make sure I can get a solid Savage put together before smashing a high power nitro in there and going through tuning - chassis etc. first get it right then drop the new engine in. I still don't know if the .25 will fire - it looks clean but not got that far yet so it may be straight in with a new .32 - time will tell!
A few bits have arrived, enough to make a start on improving the look of the chassis and installing the cut off switch in the new radio box.
Apologies for picture quality - these first images are off a Honor 8 Pro in poor lighting but will have to do until I reclaim the garage from the spiders!
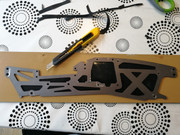
The TVP's were purchased off E-Bay and while straight were a little scuffed but for £30 delivered they are as expected: Pic isn't great but too late to get another!
I found a carbon fiber vinyl sheet in the loft leftover from an old PC build, the 3M adhesive was still good so thought I would see how it looked. Just enough to cover one side of each TVP plate:
An hours work and to be honest the finish looked pretty good. I've no idea how long it will last but decided to get another sheet off Amazon for a few quid and finish the other sides as well. As its not permanent, its not much effort to pull the TVP plates off and replace etc. Certainly looks better than they arrived. The edges were finished off with an oil based 'paint pen' inside all of the cut outs and main frame edges.
Finished TVP's
The TVP's will be replaced if the 'right' ones come up for sale on marketplaces - for now they will do just fine and allow me to get the rest of the build started.
Received a large delivery from Wheelspin this morning with loads of bits (will post up the collection tomorrow) including the new radio box (XL) and the receiver cut off switch. The switch has a LiPo mode which cuts power once the source voltage drops below 6V preventing damage to the battery:
Set to work with a craft knife and file to make a cut out for the switch in the space preset for the HPI battery meter. Ended up with this:
I measured the space for the 2500mah LiPo on my old Savage radio box. I am very fortunate but the new battery JUST fits in the XL unit - Its a 1mm either way and it would not! :
That's it for today's progress - Have tomorrow and Friday booked off work to clear out the garage and deal with a leak in the roof. I want to reclaim my 'workshop' from the spiders - it is infested... I am prepared with a spider nuke bomb or two... The misses won't put up with this on the dining table for much longer so I have to get it done and move in there. Also makes it much easier to hide deliveries - and there are so many coming at the moment she won't believe the 'yeah only cost a fiver' for so long...
So it will be the weekend before this continues, hopefully in the garage and by which time the last remaining parts should be here.
Thanks for reading!
MooGoCow!