Filling/stuffing Crank? Need Pictures!

This site may earn a commission from merchant affiliate
links, including eBay, Amazon, and others.

Larsenracing

Well-Known Member
Manufacturer
Messages
3,849
Location
Worthington, MN
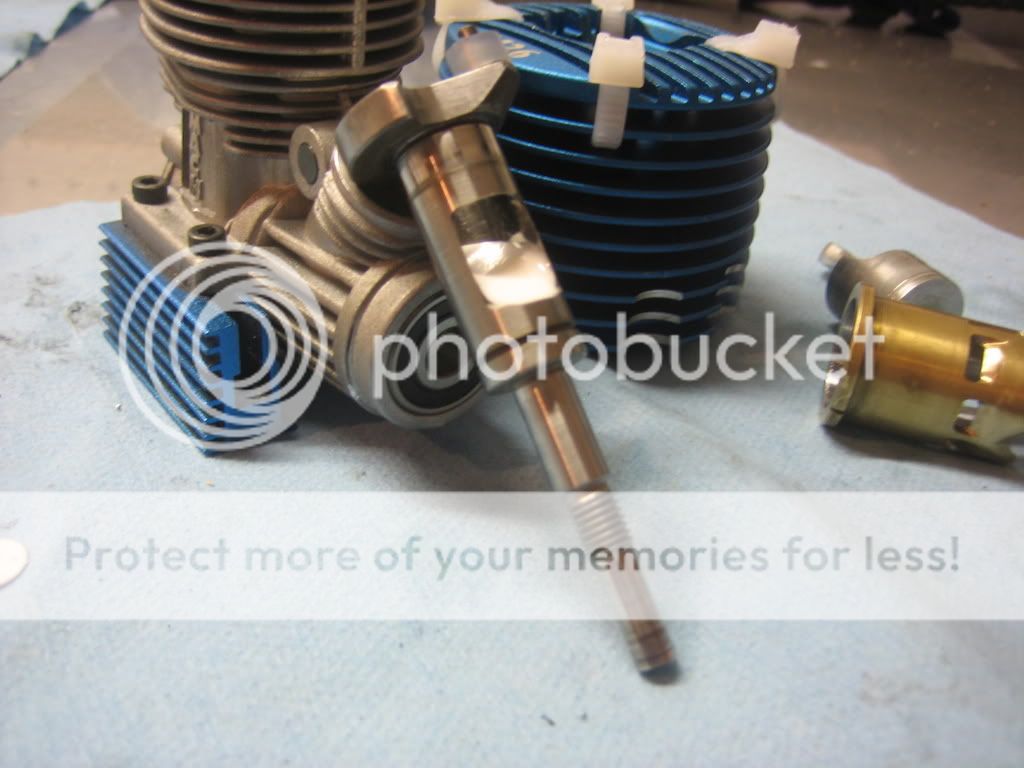
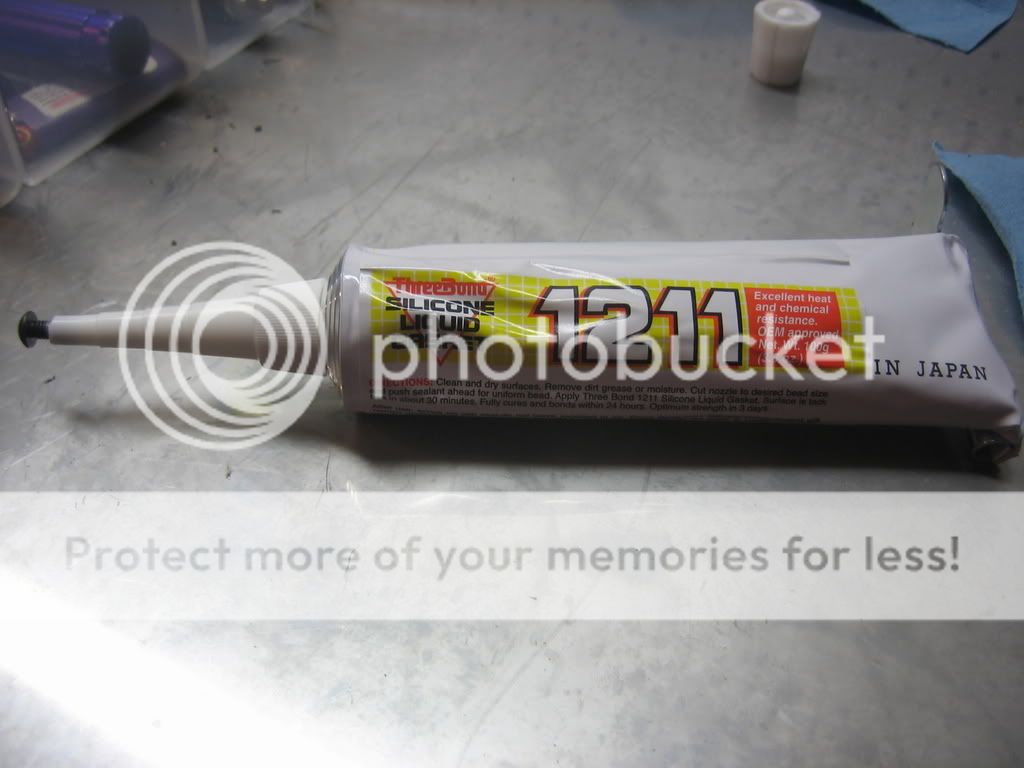
I am looking to fill my crank. I have the tripplebond 211 sealant coming. I was just wondering if any of you have any good pictures of a crank that has been filled?

I have a very good Idea how to do it I just want to know exactly how they have done it on other engines.

Also, if you have any suggestions on how to I would love to hear your opinions.
 
What is the point of filling the crank ???????????????.Never heard of that before.
 
it ramps it up for more power they ussaly do it in the high end engines or soem engine modders do it
eng-jlr-red-dot-parts.jpg
 
i guess you really do learn something new everyday as i've never heard of "filling the crank" it does make sense though!!
 
This may be true Armageddon but It does give a idea on the angle and how much to fill which is all I really need. Now I just need to do a little more work and then its time to fill. However, I am still waiting for the 1211 to arive.
 
Unfortunatley that crank has been over filled with putty, it will not let as much airfuel mix through as it could. It should look more like this.

DSC06260.jpg
 
This is one mod I have never done. I figured that only the modders did this type of work with special machines and weight balancing devices. I have never heard you can do it your self. Does anyone have any good information on how to do this mod?

I pretty much do my own port and polishing of my engines. I would like to try this out. Just never knew i could.
 
Here is a pict of mine and how it looks. I have over filled it slightly but the motor compleatly rips. It is a whole new mill now.

Truggybuilt002.jpg


This is what I used:
Truggybuilt006.jpg
 
All you did was fill the side wall of the crankshaft with silicone gasket stuff (1211)? It is easy to remove if you don't like it? How long do you let it sit before using the engine?

Is there an step by step guide somewhere?
 
No step by step that I have ever found on dong this.

I'm not sure how hard it would be to get out. You would be able to get it out it just may make a mess as its a silicone. I let it set for 48 Hrs before installing into the engine. A few extra hours wouldn't hurt just to make sure its cured.

Basically set the crank up on something so its at a 45* or steeper angle and put the stuff into it. Make sure the flats on the open edge of the crank are parallel and level. The stuff smooths out all on it's own and fills very easily.

The best thing to do is place the crank in a mill with the counterweight straight up and the output shaft straight down and mill some out of the end of the crank and filling it back up with this stuff. This removes some weight in the crank giving it less rotational mass. (Picks up RPM's faster).
 
The best thing to do is place the crank in a mill with the counterweight straight up and the output shaft straight down and mill some out of the end of the crank and filling it back up with this stuff. This removes some weight in the crank giving it less rotational mass. (Picks up RPM's faster).

You lost me on this part. I just thought there was a lots of balancing going on with the shaft. And messing up the balance is bad.

Thanks for your info.
 
Doing this milling you are just going straight threw the hole in the end of the crank with like a 3/8" or 1/2" end mill or drill bit. and taking weight from the front of the crank basically where the front bearing sits. You are hollowing it out a bit. Then refilling it with a much lighter material tan the steel.

This is nothing a beginning moder wants to attempt. Especially since it takes the right equipment to do so.
 
I got the stuff from here http://www.atlanticjetsports.com/ but you can get it from your Honda dealer or Yamaha dealer, at Honda its called Honda bond and Yamaha its called yamabond or something like that. There are lots of places on the net to get it. It is expensive but it the only thing that is nitro proof. I use it on everything as far as sealing goes.
 
having trouble finding a source to get this 1211 sealant, i have found some but it comes in a case of 6.

edit: nvmd found it, 16.99 is pretty expensive for a little tube.
 
Last edited by a moderator:
There is not real point in filling trhe crank unless you lighten it..blindly adding filler to a crank will likely hurt overall performance rather then help.....the filler itself is not the mod, but rather just a way to fill the void where a crank was lightened and nothing more...

heres what i do to warrant the use of filler


What type of drill bit do you use. The machine shop that is doing the work says that a high speed bit is too soft.
 
Thanks NIRTOJEDI that helps alot.

the steel on some of these cranks is insanely hard..I suggest using a stone to remove the first little bit of material, as the outer layer is hardened, but once you break thru the hardened layer the steel cuts easier.... Ligtening these cranks can not be done on a drill press, you definitely need a commercial quality mill
 
I got it drilled out today. The machinist had to use a carbide burr to take off the hard coating after that, It cut like butter. I will polish and port the crank then post a new thread of my work.
 
Awesome Lordinlewis, I cant wait to see it.

I will be trying this on my next crank. I have acess to a bit of a machine shop so I can do it. Thanks guys.
 

Latest posts

Members online

Back
Top