Gazzman
Old Men do Nitro to
- Messages
- 1,009
- Location
- Haywards Heath, Untied Kingdom
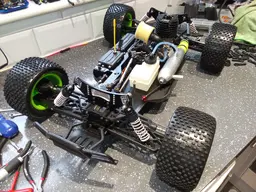
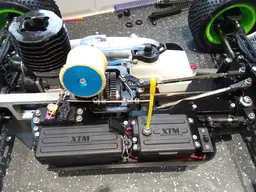
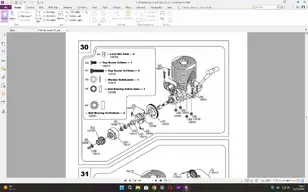
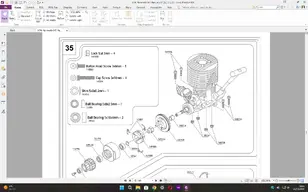
Ok so just rebuilt my mill from my XTM MT. Was re-fitting the clutch shoes when I noticed the manual seems wrong. The exploded view of the clutch assembly on page 38, shows the shoes the wrong way round.
Looking from the front of the mill (Flywheel end) it rotates counter-clockwise as do most nitro engines. I'm not sure if the shoes can't work right if fitted as per manual. It is the trailing end of the shoe that gets thrown out due to the G-force not the leading side as shown.
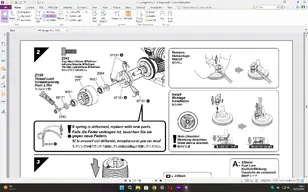
I crossed check it against all my HPI Savage manual and all show the shoes fitted the other way.
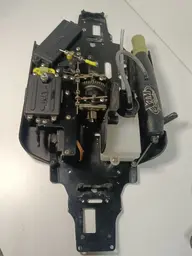
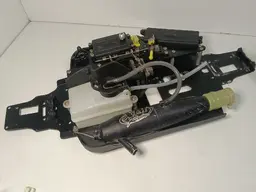
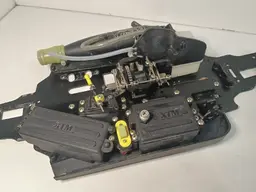
Am I missing something here, you tell me ?, Look at the 3 photos attached, 1st is the XTM ST manual, 2nd is the XTM MT manual & 3rd is the HPI 4.6 Savage manual, note the difference in the fitting direction between the XTM manual & the Savage one.
Looking from the front of the mill (Flywheel end) it rotates counter-clockwise as do most nitro engines. I'm not sure if the shoes can't work right if fitted as per manual. It is the trailing end of the shoe that gets thrown out due to the G-force not the leading side as shown.
I crossed check it against all my HPI Savage manual and all show the shoes fitted the other way.
Am I missing something here, you tell me ?, Look at the 3 photos attached, 1st is the XTM ST manual, 2nd is the XTM MT manual & 3rd is the HPI 4.6 Savage manual, note the difference in the fitting direction between the XTM manual & the Savage one.
Attachments
Last edited: