I do not remember exactly where I saw this but I cannot take credit for it as I was not the first to do this. However I thought I would post this as it may be a useful mod for anyone racing who wants to shed a little weight or stiffen up their rear end a little. Since I had plenty of spare parts and these only cost $4.79 on tower for a set I figured why not. A cool thing about this as well is you could even do this with broken hubs, depending on how badly they are damaged.
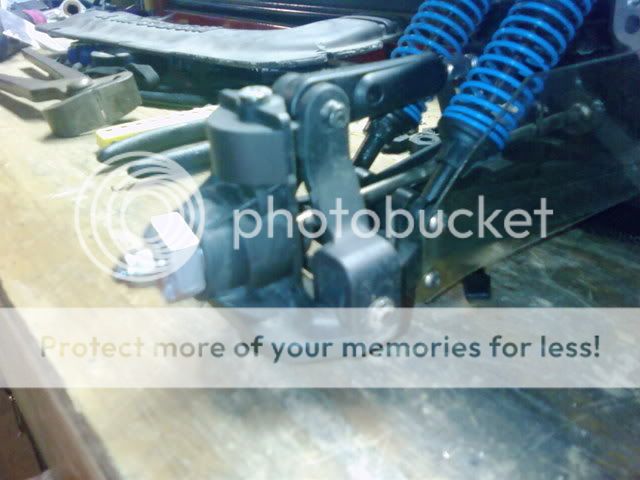
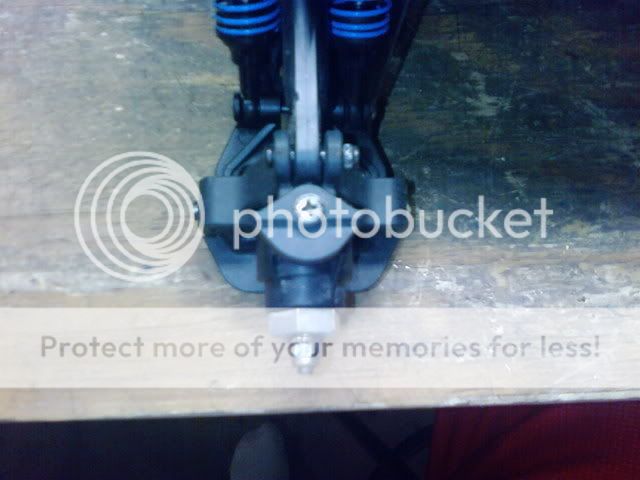
These are the stock ones up front.
Note: If you do NOT have any spares I suggest you do not do this to your good ones because if you mess up you will not be able to run your truck until they are replaced. Also, if you do not have adjustable upper A arms DO NOT attempt this, you will find out why later.
Basically what you are giong to do here is take two stock hpi upright hubs and modify them to run upsidedown on the C hub on both sides of the truck. I would suggest a dremel for this as you will want to take even material off of both sides until you can just barely fit the hub on. I would actually suggest leaving a little extra material on the ends so that you have to push a little to get them to bolt in so there is no play. You are going to want each side to be as equal to the other as you can so that your toe is not off.
Now for the reason you want to have adjustable upper A Arms. The problem I noticed with this mod is that your hubs are not going to sit normal because they just aren't designed to be run upside-down. So you'll need to adjust your upper A Arms out a little bit so that your camber is set at 0 or slightly negative, whichever you prefer. I like to run mine a little negative. The biggest set back of having to do this is that your dogbones will now have slightly more room to move around.
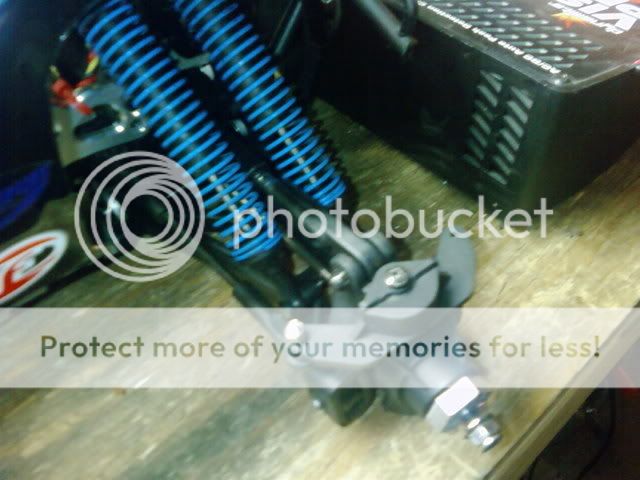
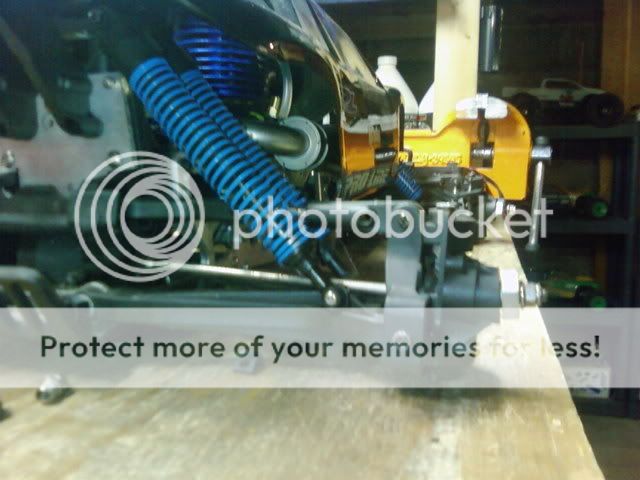
Here is a picture of how far this will allow the dog-bones to move towards the end of the cup. I do not think this is going to hurt. But if my dog bones ever pop out or my cups break in a strange way I will definately post pics of it.

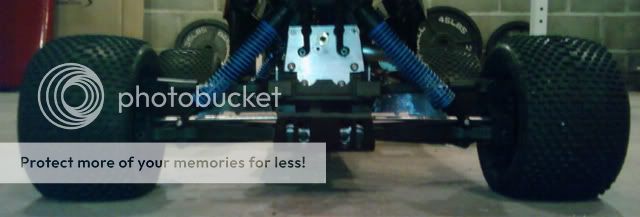
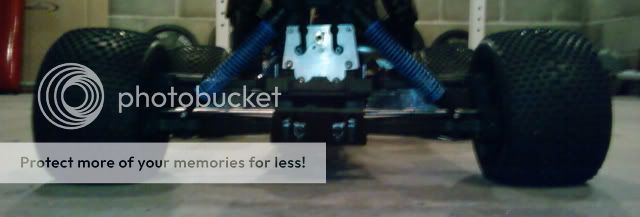
Now for some pictures of the final product.
Here are the Pro's and Con's I have found from this so far.
PROS:
-Eliminates Rear Tie Rods
-Removes Play from Rear Suspension
-Slightly Lighter than a Stock Setup
-Costs only $4.79 a side or free if you have spares
CONS
-Driveshafts have more play in the Rear
-You can't re-use the hubs anywhere else
-Possibly weaker then aftermarket aluminum
-You have to use adjustable upper a-arms and adjust them out a bit.
Basically I did this as a test for myself and I did this write-up for anyone who might find this useful or not. Once again I am not the first one to do this but I could not find any write-ups about it so use any of this info to your own risk and make your own judgement on if this is worth it or not.
Feel free to post any feedback you have or if you have done this or seen it done and how well it worked out. I will continue running this until I have problems or machine my own 1 piece eliminators out of 7075. However, I do not want to hear any stories about how your girlfriends brothers dogs mothers trainer that did this to his savage and his engine blew up or something else rediculous because of it. Unless you have pictures 😉.
My golden rule is "Screenshot, or it Didn't Happen!"
Thanks for Reading. (Unless you just looked at the pictures 😛)
These are the stock ones up front.
Note: If you do NOT have any spares I suggest you do not do this to your good ones because if you mess up you will not be able to run your truck until they are replaced. Also, if you do not have adjustable upper A arms DO NOT attempt this, you will find out why later.
Basically what you are giong to do here is take two stock hpi upright hubs and modify them to run upsidedown on the C hub on both sides of the truck. I would suggest a dremel for this as you will want to take even material off of both sides until you can just barely fit the hub on. I would actually suggest leaving a little extra material on the ends so that you have to push a little to get them to bolt in so there is no play. You are going to want each side to be as equal to the other as you can so that your toe is not off.
Now for the reason you want to have adjustable upper A Arms. The problem I noticed with this mod is that your hubs are not going to sit normal because they just aren't designed to be run upside-down. So you'll need to adjust your upper A Arms out a little bit so that your camber is set at 0 or slightly negative, whichever you prefer. I like to run mine a little negative. The biggest set back of having to do this is that your dogbones will now have slightly more room to move around.
Here is a picture of how far this will allow the dog-bones to move towards the end of the cup. I do not think this is going to hurt. But if my dog bones ever pop out or my cups break in a strange way I will definately post pics of it.
Now for some pictures of the final product.
Here are the Pro's and Con's I have found from this so far.
PROS:
-Eliminates Rear Tie Rods
-Removes Play from Rear Suspension
-Slightly Lighter than a Stock Setup
-Costs only $4.79 a side or free if you have spares
CONS
-Driveshafts have more play in the Rear
-You can't re-use the hubs anywhere else
-Possibly weaker then aftermarket aluminum
-You have to use adjustable upper a-arms and adjust them out a bit.
Basically I did this as a test for myself and I did this write-up for anyone who might find this useful or not. Once again I am not the first one to do this but I could not find any write-ups about it so use any of this info to your own risk and make your own judgement on if this is worth it or not.
Feel free to post any feedback you have or if you have done this or seen it done and how well it worked out. I will continue running this until I have problems or machine my own 1 piece eliminators out of 7075. However, I do not want to hear any stories about how your girlfriends brothers dogs mothers trainer that did this to his savage and his engine blew up or something else rediculous because of it. Unless you have pictures 😉.
My golden rule is "Screenshot, or it Didn't Happen!"
Thanks for Reading. (Unless you just looked at the pictures 😛)