Inside the CEN Diff`s

This site may earn a commission from merchant affiliate
links, including eBay, Amazon, and others.

NITRONUT

Well-Known Member
Messages
185
Location
Lindenhurst N.Y.
One of the problems that savage owners have to face sometime or other is differential failure. Sometimes it can be caused by bearing failure, weakness of the plastic diff cups or improper shimming of the ring and pinion gear.

One of the best things you can do is find a new set of diffs like the ones used by CEN Racing furnished by my buddy BLAZER X.

LETS TAKE A LOOK
Picture043.jpg

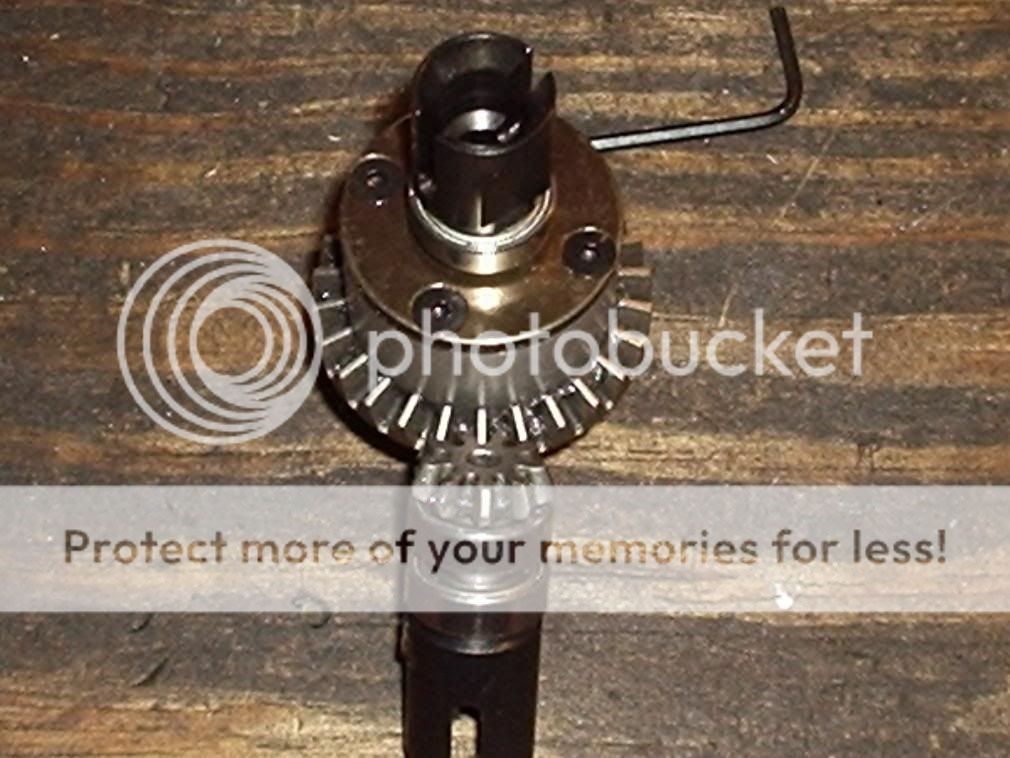
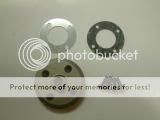
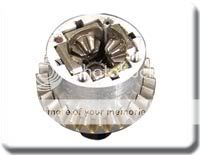
First thing you can see is that the entire diff is metal, no plastic here folks!
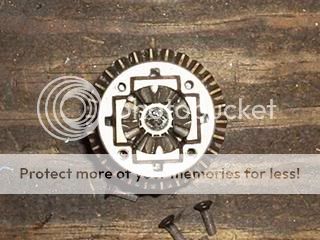
After opening the diff housing the first thing you will notice is the way the bevel gears are mounted in the housing.
There are NO cross pins to hold the bevel gears.
Picture037.jpg

Here is a look of the typical setup of bevel gears used by HPI in their diffs.
Picture035.jpg

Now lets look at the difference.
Picture036.jpg

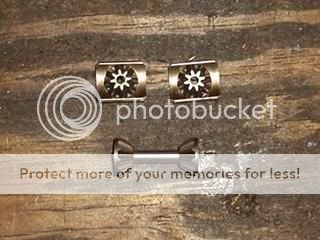
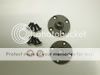
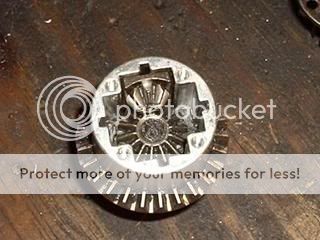
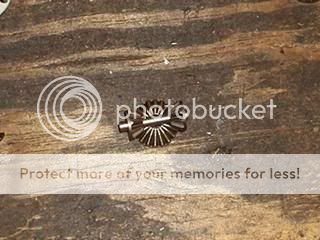
You can see the HPI`s on the bottom and the CEN bevelgears on the top. There are no cross pins holding the bevel gears in place. Instead the gears are held in place by the square holder that does not allow any flex in the drive trainand allows the bevel gear to rotate in the holder.
Here is what all four bevel gears look like installed.
Picture038.jpg


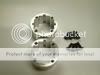
Now we get to see the dreaded bearing failure common to the savage diff`s

Allmost everyone has seen this!

Picture041.jpg
YES THAT THING AT THE BOTTOM OF THE PIC WAS A BEARING...LOL

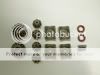
Now we can see the difference in the bearings next.
Picture040.jpg

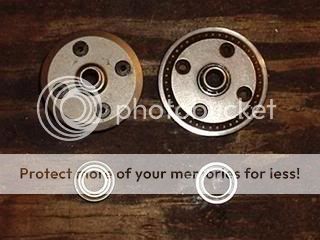
The CEN on the right uses a smaller shoulder allowing a thicker bearing that should handle the abuse we put our trucks through. The stock HPI on the left uses a much thinner bearing that just cant handle the torture.

All of the diffs have good quality O-rings to keep the diff fluid in and from what I can tell shouldnt leak a drop.
Picture039.jpg


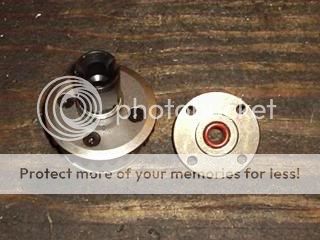
The last thing you have to do is fill them up screw the tops back on and throw them in!

Picture042.jpg

As soon as the weather gets a little warmer and I don't have to freez my but off in the garage I will post the instalation how to`s in Part 2.​
 
Last edited by a moderator:
Nice job bro. It's nice to see the real difference in these. Now do you have the part numbers needed to do this like the whole diff number and the spiders number along with all necessary parts to replace the stock crap.
 
Nice job bro. It's nice to see the real difference in these. Now do you have the part numbers needed to do this like the whole diff number and the spiders number along with all necessary parts to replace the stock crap.


Unfortunatly Blazer X built them for me but I will get the info and post it.
 
Nice. The bearings in my nitro savage which still runs stock diffs have gone already after putting less then 4 litres of fuel through them. Not impressed. I still have some spare diffs (from converting the electric savage) so hopefully I might get a bit longer run time out of these.

For part numbers I looked up the GST manual.
 
So from that do you use everything inside the plastic case like diff, all cups, and all bearings with no modifcation to the stock 21 or X bulkheads?

And is the front and rear Cen GST diff different, If so the rear one is the only one that works right?
 
Last edited by a moderator:
Yea use everything but the case,and the cup joints .. you use your stock hpi cup joints all you need to do is drill the hole a little bigger so you can use a larger pin. other then that its just shimming the the pinion ... .. front and rear are the same
 
Last edited by a moderator:
So from that do you use everything inside the plastic case like diff, all cups, and all bearings with no modifcation to the stock 21 or X bulkheads?

And is the front and rear Cen GST diff different, If so the rear one is the only one that works right?


To install the CEN diffs you may need to add some shims and a few 8mm washers to bring the pinion gear closer to the diff housing. As for the front and rears they are the same. Bolth are functional.
 
Thats great info SJ. Are these a different gear ratio than the stock setup?

I just noticed that the ones on ebay are listed front or rear not both, so I was just making sure.
 
http://www.hpieurope.com/piw.php?lang=en&partNo=86278 ......stainless replacements...ultra hard and will burn up about 15$ worth of drill bits.
http://www.hpieurope.com/piw.php?lang=en&partNo=86064 .........regular replacements.....I like these just because they are easy to drill out and replace.
The last two sets I built for guys I used stainless 8mm washers from hardware store to shim
pinion close to diff. Then I fine tune gear lash with these.......http://www.hpieurope.com/piw.php?lang=en&partNo=86598
 
Last edited by a moderator:
So just to get this straight all 3 cups need to be replaced with the stock cups or the ones Blazer X listed or is it just the 2 outdrive cups?
 
Nice job Nut! I like pictures. Was thinking of putting the Cen diffs in my project savy and the pics help with figuring them out. Kudos to Blazer for keeping these diffs going.
 
You can use your original input cups, you will not be able to run the grub screw anymore because the cen pinion runs a flat not a thru hole. Just use the cen set screws on the stock savage cups and tighten them down with red loctite.
 
So from that do you use everything inside the plastic case like diff, all cups, and all bearings with no modifcation to the stock 21 or X bulkheads?

And is the front and rear Cen GST diff different, If so the rear one is the only one that works right?

Here is what you need.
GS005.jpg

part #GS005
GS002.jpg
GS002
GS001.jpg
GS001
GS060.jpg
GS060
and this is what you will get
feature1.jpg


You will be useing the stock HPI drive cups and just drilling the hole bigger to fit the drive pin through so you can use the CEN bevel gears on the HPI cups.
 
You guys are great. This is awsome information. I will deffanetly run these on my basher.

Do you know if the gear ratio is the same as the stocker or different?
 
If you are curious of the cost of these diffs and want some built, I have put together 5 pairs now and average about 75$ for parts. I buy them as cen take outs like what SJ posted and buy the new savage cups. Let me know if interested.
 
You guys are great. This is awsome information. I will deffanetly run these on my basher.

Do you know if the gear ratio is the same as the stocker or different?

From what I can tell the ratio is a little steeper that the stock,(more speed). When I put the diffs in I will list the exact ratios.
 
Scroll down for gear ratio.

https://www.hpisavageforum.com/forums/showthread.php?t=2153&page=2&highlight=gst+diffs

Originally posted by JT.

You will need to change the spur/CB to get the same ratio as if you were using stock diffs.
For comparsion in 3rd gear
stock is 14.61:1 when using 17/49 gearing
CEN is 14.45:1 when using 15/49 gearing
(Thanks to lizard for doing the math)
 
Blazer your obviously using the wrong drill bits :p. I was able to drill straight through the hardened out drives with one old drill bit no problem. I was a bit worried though as it was the only bit of that size I had.
 
Very well could be, they are Irwin cobalt drill bits. I also had a couple of ace brand, but both of them were smoked.
 
I had a heck of a time getting the Cen drive cups open, the screws were extremly tight and not very durable for wrenching loose (factory sealed)

I also had no drill bits up to the task of drilling the drive pin holes out either.

once done they are great, it takes some skill and know how to mod them to work in a savy.
:resp:

The one thing I had to do on one of the diff`s was to use my brazing torch set very low and heat the crap out of the diff to soften up the thread lock. That crap was tough!!!!!! I took the diff apart holding it with a welding glove and when it cooled I retapped the bolt holes to get all the thread lock out and used some new hardware.
 
As nitronut said the diffs need to be heated to get the screws out without damage. I used an electric heat gun but you can use an oven or anything. The trick is that the screws come out easily once hot enough. If they aren't coming out easily then stop trying and keep heating or you will break or strip a screw. They use a stupid amount of loctite on these diff for who knows what reason.

The drill bit I used was a Sutton drill bit but being an Australian company I doubt they are available in the US. I also set the drill to a very low speed and took it fairly easy.
 
In case anybody is in need of more info, that hasn't been mentioned yet, you also need to fill the Cen pinion gear with JB Weld or something similar because the Cen pinion is hollow all the way through the center. If not filled, it will allow more dirt and sand to get inside your diff housing. Well, more than usual. Also, the drive cup pin holes that need drill larger, the size it needs to be is 3mm. If you don't have or can't get a good qaulity drill bit,, then you can use a 1/8th drill bit. I went through a bunch of drill bits also. The only ones I found that went through easy but, could only be used that one time, were Dewalt Titanium drill bits. And believe me, those drill bits are extremely strong.
 

Latest posts

Members online

No members online now.
Back
Top