How to Mount Charge lead in X Battery Box!

This site may earn a commission from merchant affiliate
links, including eBay, Amazon, and others.

Larsenracing

Well-Known Member
Manufacturer
Messages
3,849
Location
Worthington, MN
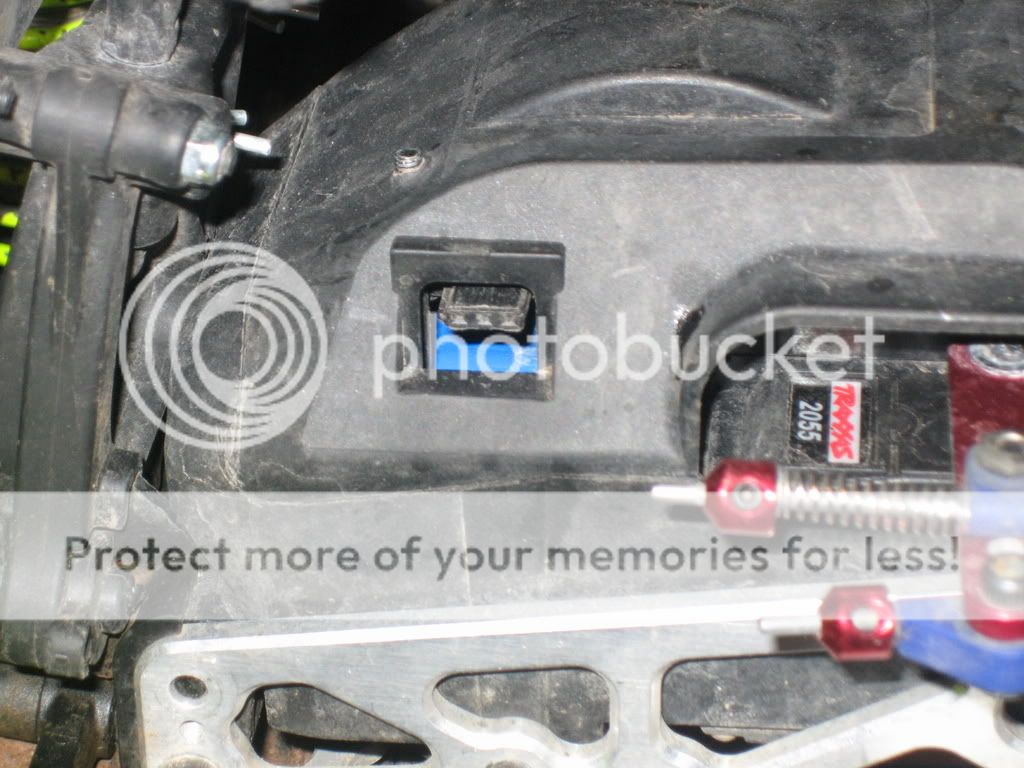
Not sure if all of you know about this nice feature that HPI has incorporated into the Savage X Battery Box. I'm sure some of you are wondering why HPI placed a squair hole in the left side of the battery box and places a rubber plug grommit in the hole.

I know some have there charge lead hanging loose out of this!

Well HPI actually planed for you to attach your Hump packs charge lead to there box for easy access, so heres how.

First you need to dig out of you spair parts that came with the truck or you can purchase this kit which is number 85236 or cheaper yet 85237.

The two parts that are need are the two in the vary center of this picture.
hpic5236.jpg


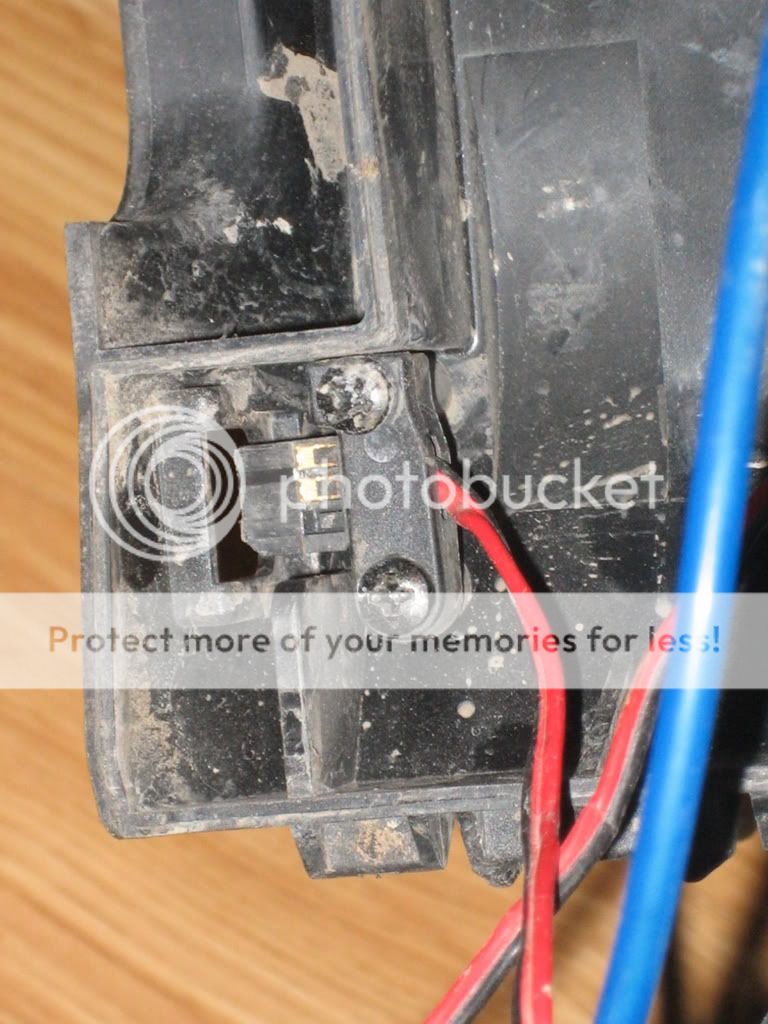
Second you need to replace your On/Off switch to this part or simular.
http://www3.towerhobbies.com/cgi-bin/WTI0095P?FVSEARCH=FUTM4370&search=Go

Third you need to find 2 short screws like 2mm X 10MM or something left over in your box.

Forth plug it in: Red Mail goes to Reciever, Black Female goes to Hump Battery and black Male gets attached to the box.

Here are some picutres with this installed, I think the assembly will be self explanitory with the following pictures.
batbox001.jpg


batbox002.jpg


batbox003.jpg


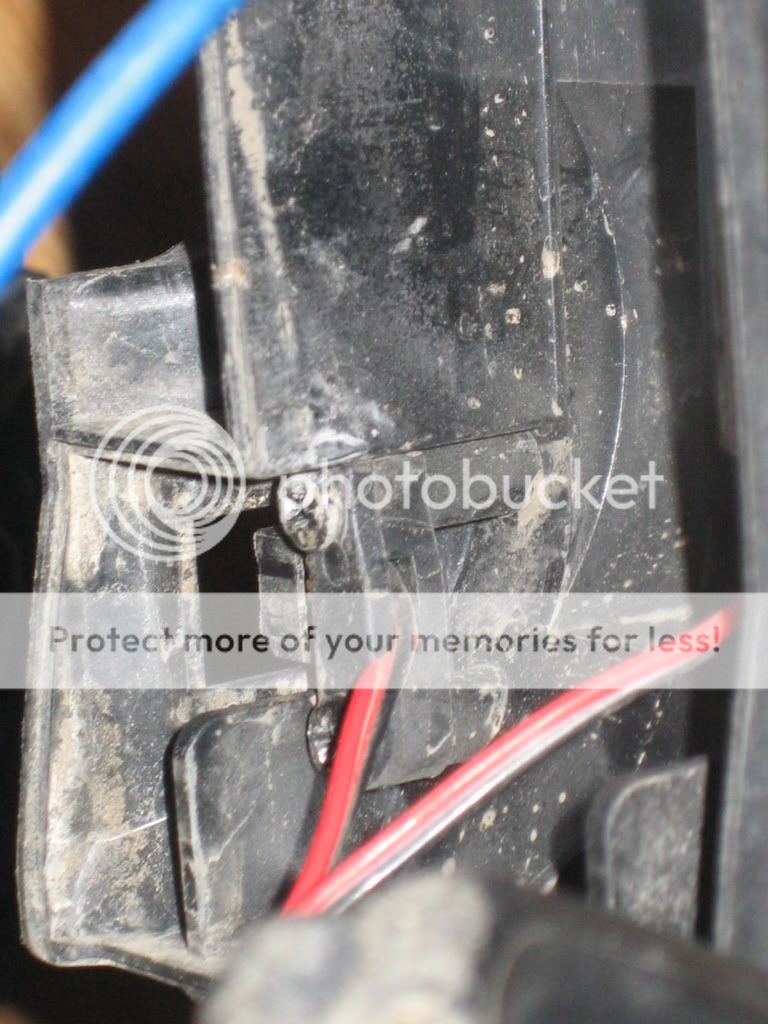
Yes, you are able to use the stock Rubber plug grommet to cover the charge lead when running the truck if you so choose.

I hope this helps!
 
I use mine. Its a great little location. Even though the plug is hard to get back just right sometimes. Thanks for posting this up though. I bet there are a few people that didnt know that. You should have used 1 size smaller screw in that outside hole though. :dmt:
 
Ok if the link to the top picture doesnt work to bring in the pict here is a link to the part explaned there: http://www3.towerhobbies.com/cgi-bin/WTI0095P?FVSEARCH=85236

Thanks Oregon, I think there are many people that didnt know that as I have seem many pictures with the leads just hanging out the side of the box.

HaHa you noticed that the front screw pocked threw the top did ya. I did it and was going to replace it and took a second look and was like who cares it isnt hurting anything. So there it is still there. O well.


You didn't see the Traxxas 2055 servo either did ya. LOL:axed: :dmt: :istupid: Oops. Ah the stock SF-2 died so I had that one laying around and threw it in there its just a bashin truck.
 
Last edited by a moderator:
I cut the connector off a traxxas servo to wire it into my switch right after I saw this post saved 8.99.LOL Works great and only took 15 mins. Heres a little rep for ya !!
 
Great work larsen. You have any suggestions for the MT2 radio box?
 
Great tip, Larsen! I know a lot of folks aren't aware of this one.

I can also add this...I mounted a 3" servo harness extension there and ran that to the switch harness, so I could quickly unplug it to remove the radio box lid completely.
 
Kieth, I have no idea of any tricks on the MT2, Sorry.

Thanks guys for the comments and I hope this comes in usefull for some of you. It is a nice Feature that HPI added, some are just unaware or it. I didn't know about it either right away then got pointed in the right direction by others as well.
 
look great that how i have mine on my truck and i love it i don't think there is any other way to do it but that just me
 
Thanks guys I did this to my truck last weekend and it works like a charm. I would of never thought of it. I was getting tired of trying to open my radio box with the roll cage on the truck. Thanks again
 
great find larsen how did you figure this out? did you find it in the manual or just a smart guy lol thanx for the info
 
But can I use this mod and and the HPI battery level indicator that is connected to the battery As I know, you connect the battery to tle indicator and this to the switch.

And if using this mod, I guess I have to connect the Black Female Connector of this new switch to the battery level indicator. And so, when carging, the electricity that passes through the indicator can broke it?

Thanks.
 
You need a switch that has a charge lead on it. This way the power that you are putting into your battery isn't going threw the Level Indicator as its going straight into the battery.
 
And what switch do I have to use?

The On/OFF switch that you mentioned in the first page is not enough? I mean, to connect the battery to the level indicator and this one to the switch via the Black Female. The Red Male goes to receiver and the Black Male attached to the box.

Or what circuit I have to use? As I know, I must connect the level indicator to the battery and the battery comes with one wire. ???

What I should change in the picture attached? If for example I remove the level indicator from the design, it is ok, isn't it? So, with the level indicator, what else I should use? And where?

Thanks
 
Last edited by a moderator:
Sorry i'm not sure what I was thinking. You diagram is correct. I wouldnt think there should be any issue with charging in like that.
 
Final question. In my diagram, when charging the battery, the power goes through the level indicator. Is that a problem or no?
Thanks, this is my uncertainty.
 
Wait!!!!!

You need the Level indicator after the switch. Between the switch and the Reciever, otherwise the indicator will always be on and draning the battery even thought you arn't using the truck.

I was thinking correctly the first time.

It needs to look like this:

--------------------Level Indicator--reciever
Battery--Switch<
--------------------Charge Lead
 
Last edited by a moderator:
Sorry to bother you, but just to understand before the parts arrive.

So, now, using the mod you described, I mean the switch listed on the first page, the scheme should be as you said, I mean

Battery ---> ON/OFF switch --->
  • ---> level indicator --->receiver
  • ---> charge lead
 
Last edited by a moderator:
So, today I received my pieces and connected them as supposed, as I've described and larsenracing agreed.

Now, one final question:

- to charge the battery, the switch should be set to OFF, right?

Thanks
 
Yes have the switch in the off slection otherwise there will be an open link to the reciever. Most high end chargers will not allow you to charge on this but if your just pluggin into the whall with a cheep charger it may let you but will take for ever.
 
Thanks! rep for you (think I managed to give you, it's the first time!)

And I have a MRC Super Brain 977 Charger...

Have a great day (at least here in Romania it's morning!)
 
Does anyone have any pics of this mod... I am a tad confused about what exactly goes under the rubber grommet. I have added a rechargable bat-pack and switched to a traxxas on-off switch. I am waiting for HPI's bat-level indicator to come in, but I am confused about what the mod looks like and if it is something that comes with the savage from the factory.
 
Does anyone have any pics of this mod... I am a tad confused about what exactly goes under the rubber grommet. I have added a rechargable bat-pack and switched to a traxxas on-off switch. I am waiting for HPI's bat-level indicator to come in, but I am confused about what the mod looks like and if it is something that comes with the savage from the factory.
Why don't you check page 1, post 1. :stickpoke:
 
I guess the pics weren't showing when I first checked the topic...thanks they are working now!!! I should be able to do this with my set up...I was wondering what that hole was for.
 

Latest posts

Members online

Back
Top