FLM Ofna 250 Mid Tank Build

This site may earn a commission from merchant affiliate
links, including eBay, Amazon, and others.
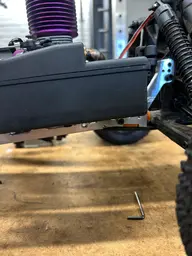
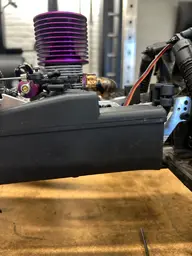
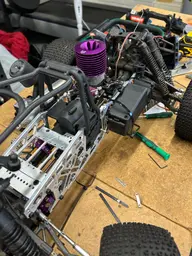
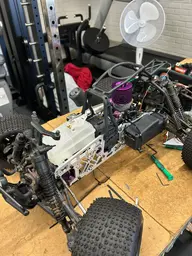
Reading up on other Mid Tank mods to the HPI Savage - some have stated that the truck becomes front heavy - with the larger 250cc Ofna tank I'm going to use - I expect this will be the case for me - so I've gone ahead and decided to move as much weight to the back of the truck where I can - which has meant moving the receiver battery location.
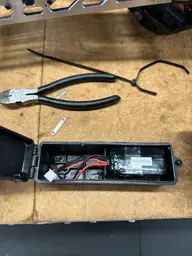
 
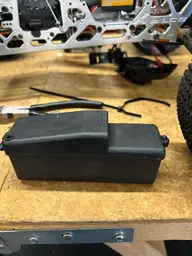
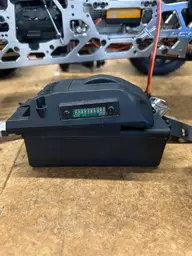
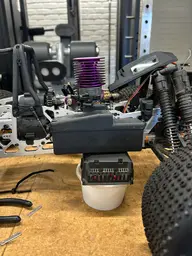
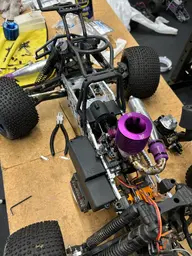
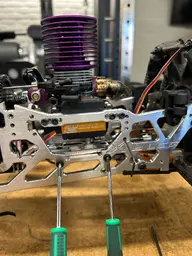
I ended up getting a CEN Fun Factor radio box from eBay and I think this will work - I plan on mounting using the 3 holes shown in the photos below - the radio box will need some modding but it is long enough to keep the HPI LED battery strip:
 

Attachments

  • IMG_1551.webp
    IMG_1551.webp
    295.9 KB · Views: 2
  • IMG_1553.webp
    IMG_1553.webp
    245.2 KB · Views: 2
  • IMG_1554.webp
    IMG_1554.webp
    262.8 KB · Views: 2
  • IMG_1556.webp
    IMG_1556.webp
    290.4 KB · Views: 2
  • IMG_1557.webp
    IMG_1557.webp
    364.3 KB · Views: 2
  • IMG_1558.webp
    IMG_1558.webp
    207.3 KB · Views: 2
  • IMG_1559.webp
    IMG_1559.webp
    167.6 KB · Views: 2
  • IMG_1560.webp
    IMG_1560.webp
    295.4 KB · Views: 2
  • IMG_1561.webp
    IMG_1561.webp
    301.2 KB · Views: 2
  • IMG_1562.webp
    IMG_1562.webp
    374.3 KB · Views: 2
I think moving the receiver battery to the back of the truck will also give some more options to secure the fuel tank at the front without the battery getting in the way.
 
I was also playing around with the throttle linkage - and have had to do the following:

- Put a bend in the brake rod to move it out away from the chassis slightly
- Reduce the size of the plastic throttle carb mount by cutting it but making sure there is still enough length for the throttle rod to thread into
- Reduce the size of the throttle spring on the throttle rod by clipping some coils away
 
Some new fuel tube arrived in the post which is great news - the thing I am still not happy with is the LRP on the 17t clutch bell - it still feels like the engine is slightly at an angle and not completely parralell with the TVPs to get the mesh right - by slightly getting the engine to turn in towards the center is having a negative imapct on the overall mesh - anyone else experienced this before?

The HPI 4.1 with the purple head in the photos above is on a 15t clutch bell and the engine mount fits square on.
 
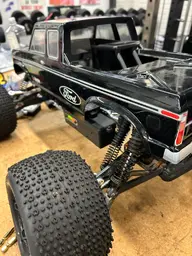
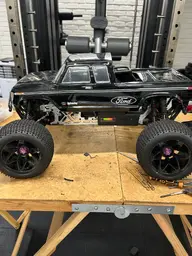
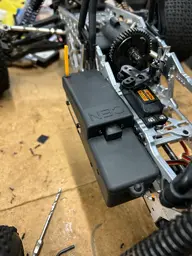
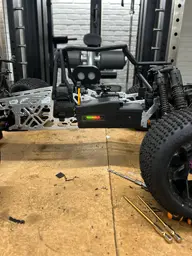
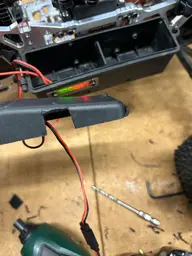
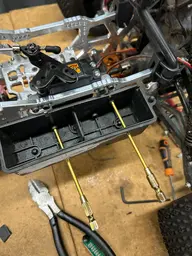
Some more updates - mounted the radio box and pretty happy with the result - bit of tidying up needed where I have cut into the radio box to mount the led light strip and notch for the forward servo mount screws - but here are some photos:
 

Attachments

  • IMG_1585.webp
    IMG_1585.webp
    369.6 KB · Views: 1
  • IMG_1584.webp
    IMG_1584.webp
    278.5 KB · Views: 1
  • IMG_1583.webp
    IMG_1583.webp
    380.3 KB · Views: 1
  • IMG_1582.webp
    IMG_1582.webp
    197.8 KB · Views: 1
  • IMG_1581.webp
    IMG_1581.webp
    309.3 KB · Views: 1
  • IMG_1580.webp
    IMG_1580.webp
    137.8 KB · Views: 1
  • IMG_1578.webp
    IMG_1578.webp
    281.2 KB · Views: 1
  • IMG_1577.webp
    IMG_1577.webp
    255.9 KB · Views: 1
  • IMG_1576.webp
    IMG_1576.webp
    218.3 KB · Views: 1
I've found that mounting the radio box where it is makes the battery indicator more visible and accessing the on/off switch is easier than before because it is just a case of reaching in behind the rear wheel arch.
 
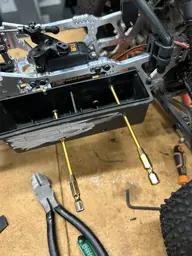
The box is mounted with three anchor points - 2 being the engine mount plate - and the 3rd being another threaded screw hole on the FLM TVP.
 
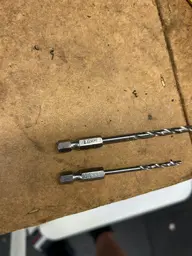
I've drilled through the outside of the radio box to the engine mount holes using a 4mm drill bit and I've used a 3mm drill bit for the 3rd mounting point. The plastic the cen radio box is made from is really nice - this allows the front of the box to be slightly flexed to allow the opening of the lid whilst being mounted to the TVP still.
 
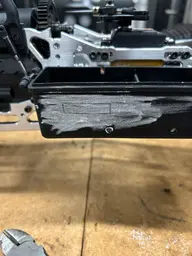
I used some chalk and then a sharp tip to mark the outline of the battery indicator. Sprayed some silicone onto the radio box to keep it flexible - looking for some rubber grommets now to plug the 3 access holes to keep the radio box somewhat water tight.
 
If anyone knows of where to get some rubber grommets just let me know - all three access holes are drilled out to 4mm
 
Also - forgot to say - to locate the 3 mounting points - I chalked up the cap of the bolts then pushed the radio box up against the bolts - the chalk left the location points for where to drill.
 

Latest posts

Members online

Back
Top