THE PIPER
TIME TO PAY THE PIPER
- Messages
- 514
- Location
- Brantford Ontario Canada
Hey guys just thought I'd share this custom wheelie set I came across while meeting a guy in stoneycreek just by my house. I took some of his ideas and used his as a tempplate so I cant take all the credit.
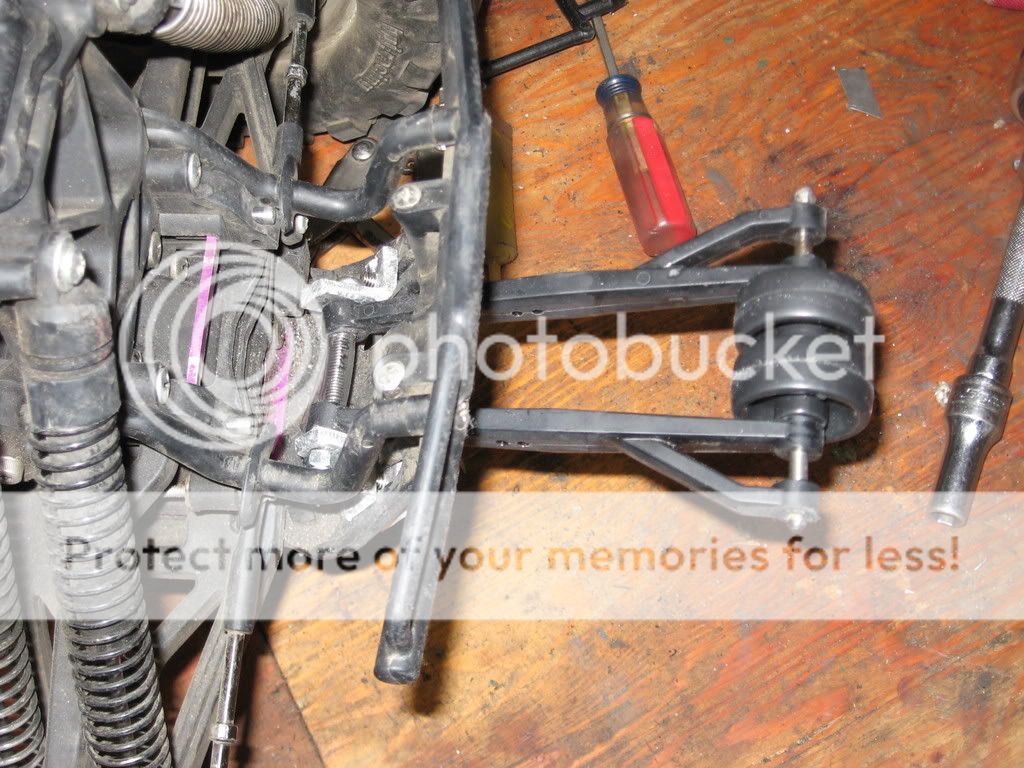
Lets start: Here in this picture is all the gear you will need to get started.
2 used upper control arms from any savage, 1 length of 5/32 music wire non threaded(get that at any LHS), 12X5/32 DUBRO wheel collars, Dubro airplain wheels part #175T, 5/32 drill bit, hex screwdriver. Oh almost forgot your old hpi wheelie bar your going to need ends off that to mount it but you might have your own idea.

now take the 5/32 drill bit and drill the wheels and the front of the control arms use the holes there just make them bigger


Take the music wire and cut two 3'' rods and one 4 1/4 rod.


Drill the control arm 1 3/4 measuring from the tip I didnt do that for some reason..:duh:

Insert the 3'' rod to the top & middle of the control arm with the wheel collars
The middle rod will suppot the wheelie bar better. I'll show u later.


insert the 4 1/4 rod to the bottom with the collars

Take your wheels and insert them on the 4 1/4 rod with the collars at the ends.


Thats the brunt of it for now I'll have to leave this for now I need to get to the bank tonight next I'll show you the way I mounted mine its still rough but it looks like it might work. You might have your own idea. :beer: Cheers!
Lets start: Here in this picture is all the gear you will need to get started.
2 used upper control arms from any savage, 1 length of 5/32 music wire non threaded(get that at any LHS), 12X5/32 DUBRO wheel collars, Dubro airplain wheels part #175T, 5/32 drill bit, hex screwdriver. Oh almost forgot your old hpi wheelie bar your going to need ends off that to mount it but you might have your own idea.
now take the 5/32 drill bit and drill the wheels and the front of the control arms use the holes there just make them bigger
Take the music wire and cut two 3'' rods and one 4 1/4 rod.
Drill the control arm 1 3/4 measuring from the tip I didnt do that for some reason..:duh:
Insert the 3'' rod to the top & middle of the control arm with the wheel collars
The middle rod will suppot the wheelie bar better. I'll show u later.
insert the 4 1/4 rod to the bottom with the collars
Take your wheels and insert them on the 4 1/4 rod with the collars at the ends.
Thats the brunt of it for now I'll have to leave this for now I need to get to the bank tonight next I'll show you the way I mounted mine its still rough but it looks like it might work. You might have your own idea. :beer: Cheers!