This thread is how I did the preventive maintenance of my Picco which just finished its 3rd gallon . There are different and better ways, however I am working with the household goods I have.
1. Oven- heating source
2. Temp gun- for reference as the oven temps are accurate to + or- 5 degree F
3. Pencil- used to punch out the front bearing
4. Tweezer
5. Mechanics glove
6. Wooden cutting board- working surface
7. Carb Cleaner by Gunk
8. HPI engine maintenance oil
I used an oven which I set to 275 F to initially start the heating process. This allows for the stock bearing to be removed.
I tapped the crank case on the wooden cutting board at the rear allowing the rear bearing to fall out. Then I got the pencil and ran it through the crank case and onto bearing and tapped the pencil on the board allowing the front bearing to come out.
With the bearings out, I took the time to clean out the crank case and internals with a Gunk carb cleaner.
I then replaced the Connecting Rod and wrist pin clips.

I used the wifes tweezer to remove and install the wrist pin clips. Shhh do not tell, I will return it clean. Notice in the next two pictures of how the connecting rod is attached with the piston. There is a hole on the connecting rod that is used for lubrication and must be installed onto the piston and into the crank case in the foward direction of the bearings.


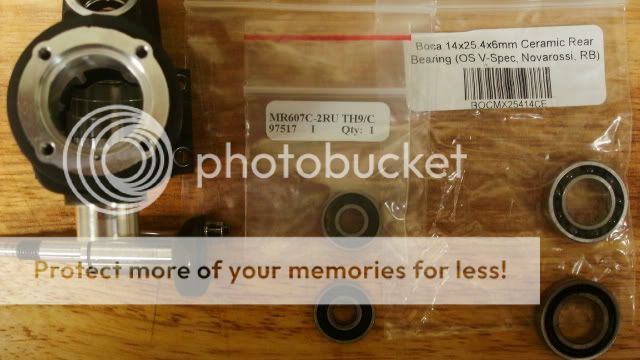
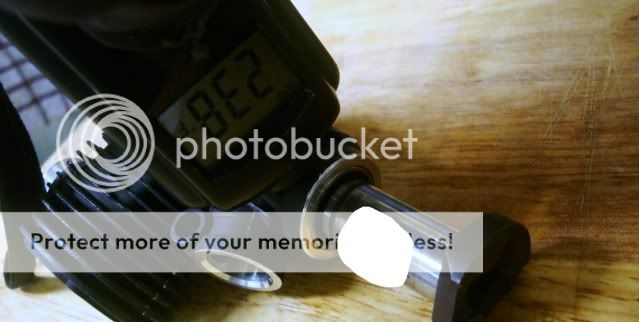
The cleaning, connecting rod and cylinder is done. Time to restart the oven and preheat it to 300 F. Meanwhile the heat is coming up, place the bearings onto the crank shaft like so. I used the crank shaft to hold and place the bearing into its respective location in the cranks case. On the front bearing have the sealed side face the rear bearing, this is going to be the side that is going to be the exterior of the crank case. For the rear bearing, face the open side towards the rear of the crank shaft. Once the oven is preheated, place the crank case into the oven and allow it to heat up to 275 F ; use the temp gage to check the crank case temperature.

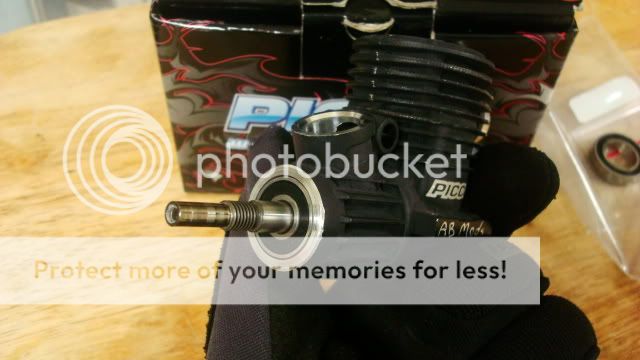
This is what why I said to put the front bearing having the sealed side facing the rear bearing, this is going to be the side that is going to be the exterior of the crank case. Allow the bearing to sit there for 5-7 seconds to allow the crank case to grab the bearing. This picture was taken after I had installed the rear. Time constraints.
After the front bearing is complete, pull the crankshaft away from the crank case. Now insert the crank shaft through the rear of the crank case and pull on the crankshaft; you will hear a click. Allow the rear bearing to sit for several seconds again so the crank case can grab a hold of the bearing. DONE! Bearings installed.
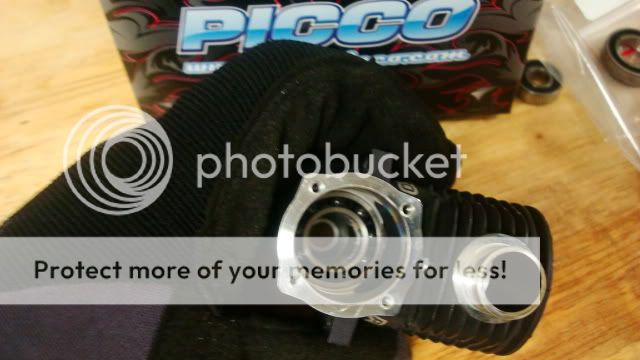
This is how it looks without the crank shaft
Joe, remember to face the piston/connecting rod the correct way. Take your time installing the connecting rod to the crank shaft. Be patient!
Connecting Rod installed

Cylinder installed

All oiled up and ready for the remainder of parts instillation
1. Oven- heating source
2. Temp gun- for reference as the oven temps are accurate to + or- 5 degree F
3. Pencil- used to punch out the front bearing
4. Tweezer
5. Mechanics glove
6. Wooden cutting board- working surface
7. Carb Cleaner by Gunk
8. HPI engine maintenance oil
I used an oven which I set to 275 F to initially start the heating process. This allows for the stock bearing to be removed.
I tapped the crank case on the wooden cutting board at the rear allowing the rear bearing to fall out. Then I got the pencil and ran it through the crank case and onto bearing and tapped the pencil on the board allowing the front bearing to come out.
With the bearings out, I took the time to clean out the crank case and internals with a Gunk carb cleaner.
I then replaced the Connecting Rod and wrist pin clips.
I used the wifes tweezer to remove and install the wrist pin clips. Shhh do not tell, I will return it clean. Notice in the next two pictures of how the connecting rod is attached with the piston. There is a hole on the connecting rod that is used for lubrication and must be installed onto the piston and into the crank case in the foward direction of the bearings.
The cleaning, connecting rod and cylinder is done. Time to restart the oven and preheat it to 300 F. Meanwhile the heat is coming up, place the bearings onto the crank shaft like so. I used the crank shaft to hold and place the bearing into its respective location in the cranks case. On the front bearing have the sealed side face the rear bearing, this is going to be the side that is going to be the exterior of the crank case. For the rear bearing, face the open side towards the rear of the crank shaft. Once the oven is preheated, place the crank case into the oven and allow it to heat up to 275 F ; use the temp gage to check the crank case temperature.
This is what why I said to put the front bearing having the sealed side facing the rear bearing, this is going to be the side that is going to be the exterior of the crank case. Allow the bearing to sit there for 5-7 seconds to allow the crank case to grab the bearing. This picture was taken after I had installed the rear. Time constraints.
After the front bearing is complete, pull the crankshaft away from the crank case. Now insert the crank shaft through the rear of the crank case and pull on the crankshaft; you will hear a click. Allow the rear bearing to sit for several seconds again so the crank case can grab a hold of the bearing. DONE! Bearings installed.
This is how it looks without the crank shaft
Joe, remember to face the piston/connecting rod the correct way. Take your time installing the connecting rod to the crank shaft. Be patient!
Connecting Rod installed
Cylinder installed
All oiled up and ready for the remainder of parts instillation
")