Jamiesavage
Active Member
- Messages
- 55
Today I will take you step-by-step through the process of sealing your engine. Whether your engine is brand new, or you have been running it for a year or more, if you have never sealed it, now is the time. By sealing your engine from the beginning, you are eliminating most of the tuning problems that plague nitro engines. If you are having trouble keeping your engine tuned properly, chances are you have an air leak somewhere on your engine. By following this easy to follow guide, you will be well on your way to having a trouble free engine. The engine I am sealing up today is a new STS .28. Now your engine may be slightly different, but the process is essentially the same for all nitro engines.
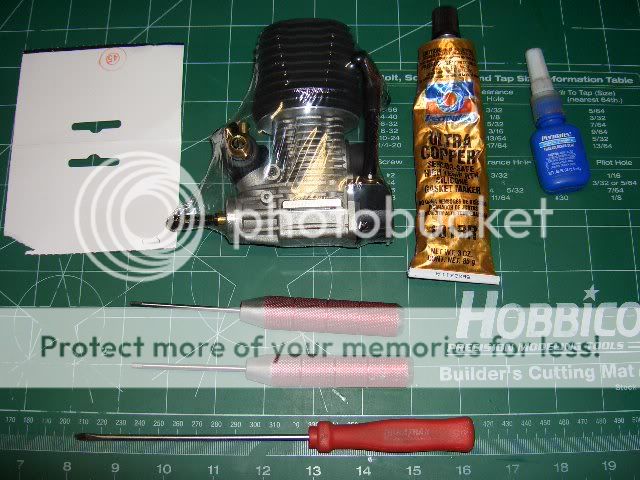
First off you will need a clean work area. I like to use this Hobbico cutting mat. Give the area a good wipe down to eliminate the chances of foreign debris entering your engine. Here are some things you will need: A tuning screwdriver, a couple of good hex wrenches, blue loctite, silicone sealer (I like Permatex Utra Copper), your engine, piece of scrap thick paper (I use package tops) and a couple of things that didn't make it in the pic is some Team Associated's Green Slime grease, and some good nitro cleaner.
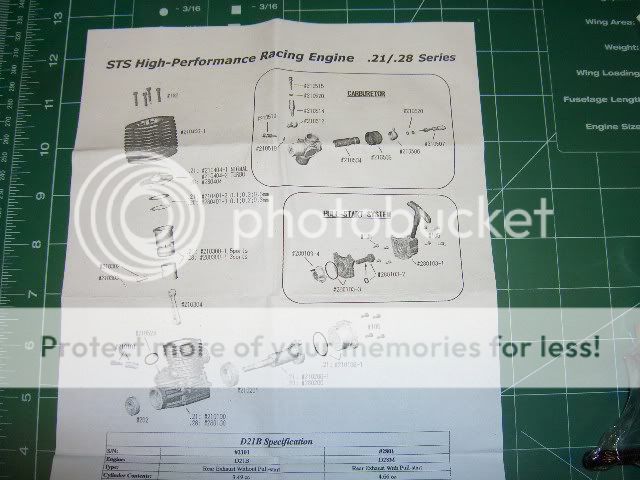
Another good thing to have with you as you disassemble your engine is the manual that came with your engine to refer to so there are no suprises along the way.
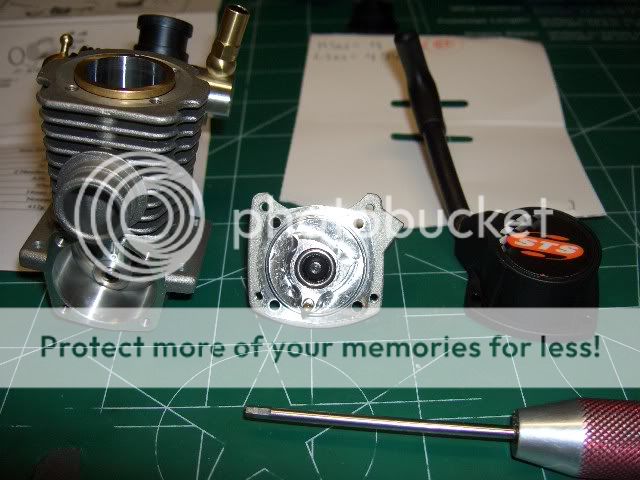
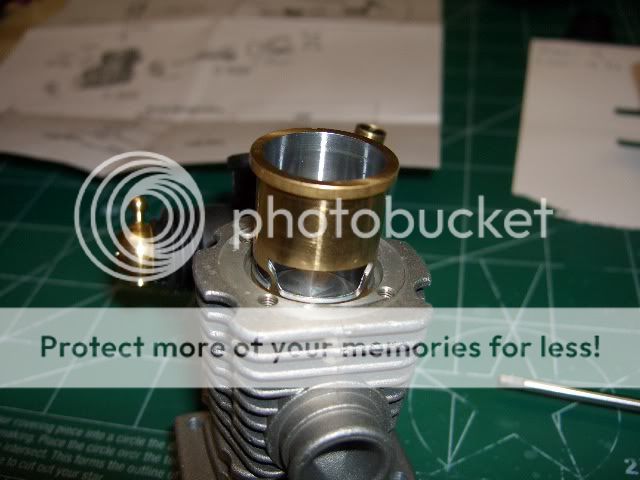
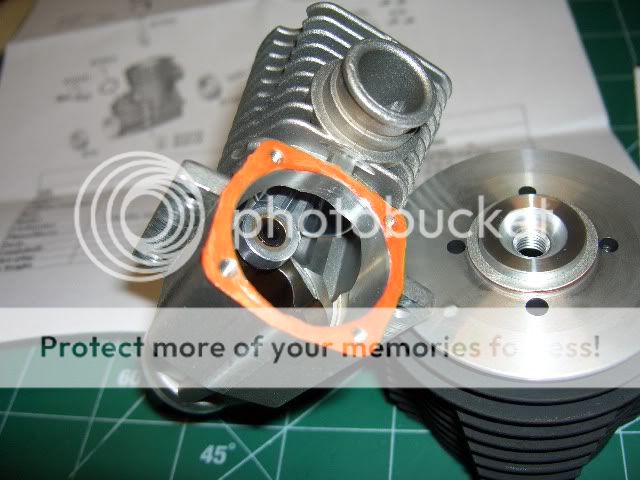
Now go ahead and take off the pullstart, backplate and head.
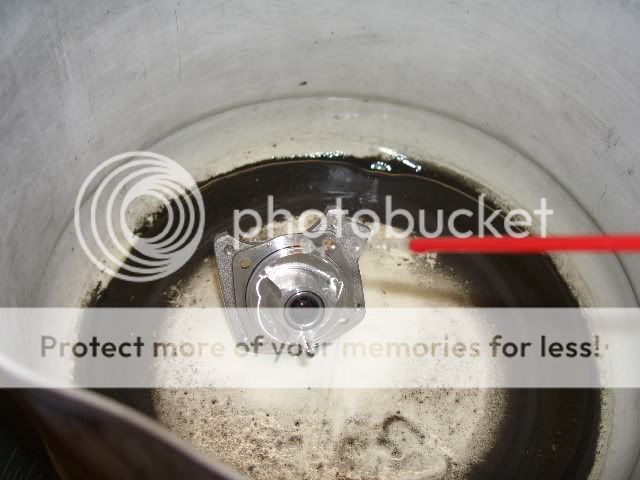
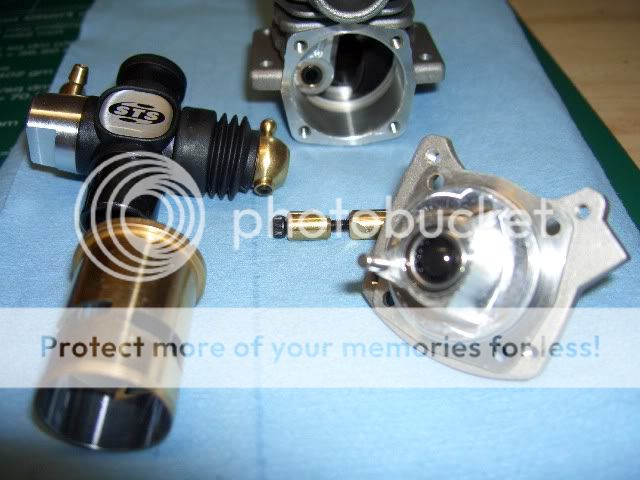
I like to use the lower part of a fuel container to put metal parts into for cleaning. You want to clean the areas you will be sealing so that the silicone can get a good bond to the metal surface.
I also like to go ahead and pull the sleeve out for a close inspection. Now be careful doing this because you don't want to damage this important part of your engine. Check it carefully for any burrs, or loose shavings. Do the same for the rest of the engine. look inside the crankcase for any burrs and/ or shavings and remove carefully. My other STS .28 engine had a piece of metal shaving in the crankcase.
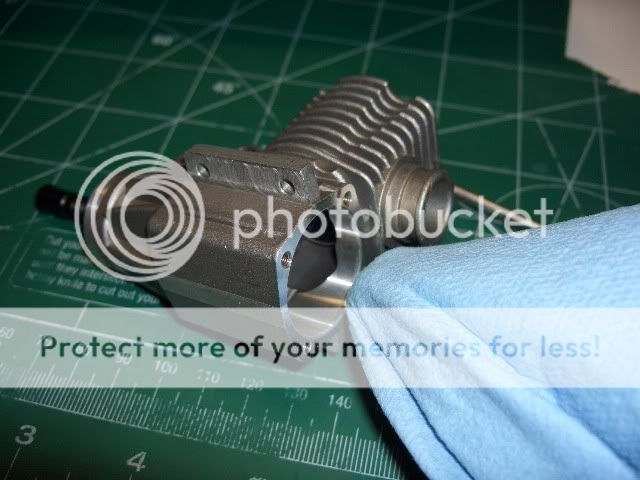
Now take a clean cloth with some nitro cleaner on it and carefully clean the back of the crankcase (where the back plate bolts on). This will ensure a perfect seal for the back plate.
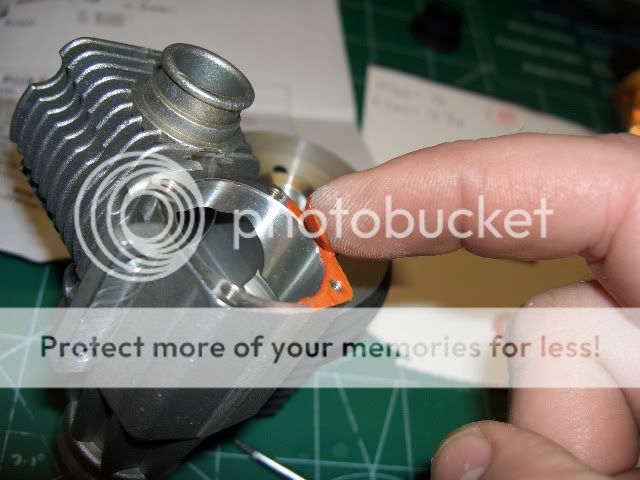
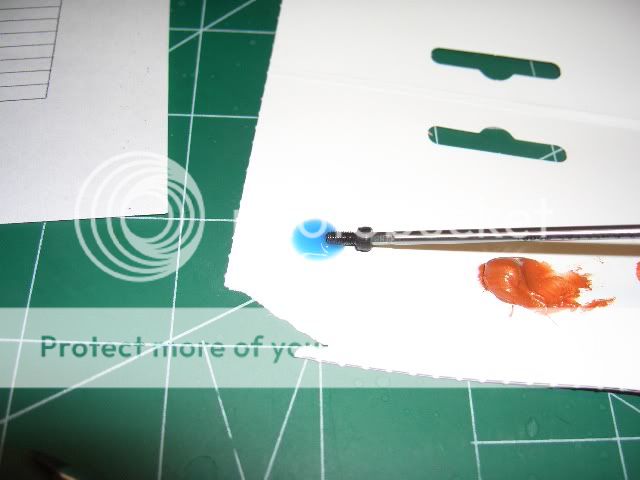
Most engines have an o-ring on the backplate. There is no need to mess with this- let it do it's job. We are just going to add some extra insurance by sealing the backplate. Squeeze a small amount of silicone sealer onto the thick paper. Dab a litle on your finger and put a very thin coat on the mounting surface of the crankcase.
Now place the backplate back on the engine being careful to align the crank pin on the crankshaft. It is important in this step to use loctite on the screws that attach the backplate. I like to use blue loctite, but HPI reccommends red. Red loctite is HIGH STRENGTH and makes it very difficult to remove if used on small screws like the ones used on our small nitro engines. Also, loctite the screws that hold your pullstart on as well. remember you don't need to crank down the pullstart bolts, they just need to be snug.
Here the backplate is loctited into place. Rememer to use the X- pattern when tightening the screws.

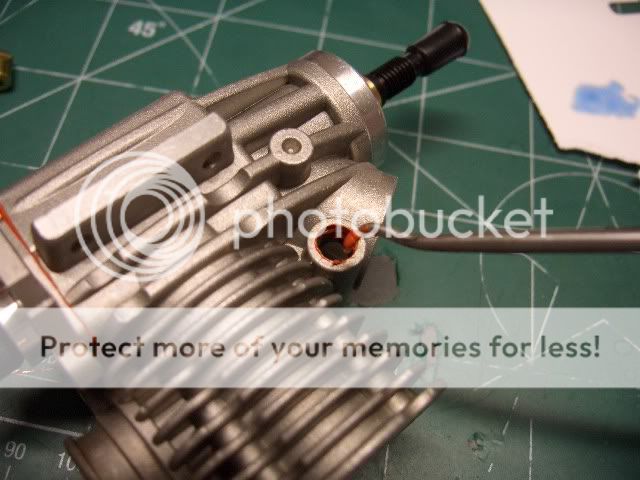
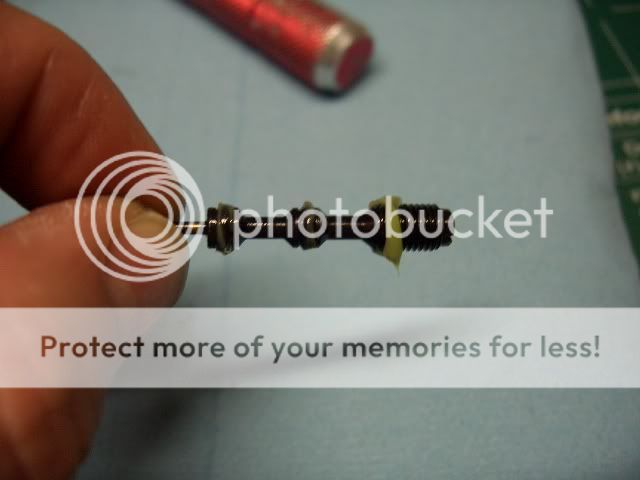
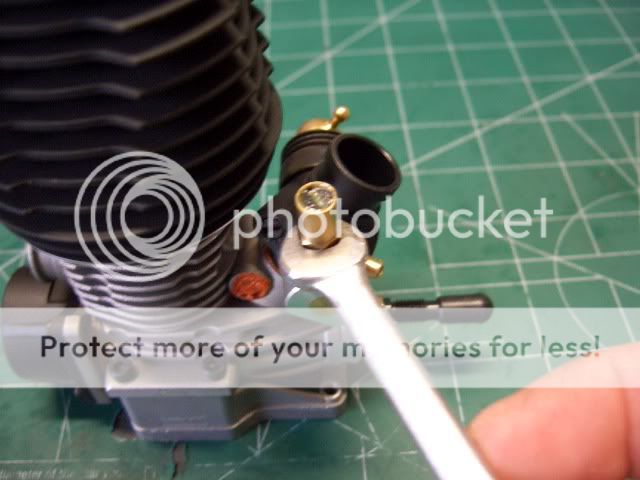
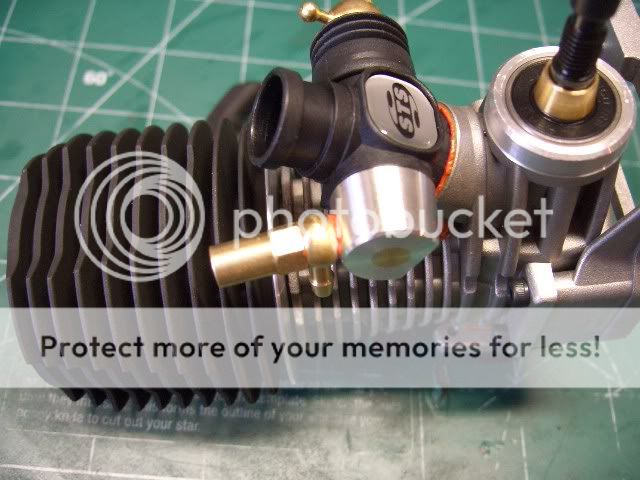
Next we will seal up the carburettor and pinch bolt. Start by applying a thin layer of silicone around the inside edges where the pinch bolt goes. Do this on both sides of the engine.
Next add a small amount of silicone to the upper neck of the carb. This engine has an o-ring down in the block to seal the carb opening. We are not going to mess with that- let it do it's job. We are just going to add more insurance by sealing the upper neck of the carb. Slide each half of the pinch bolt together from both sides and get the bolt started.
Now at this point, you want to go ahead install the engine mount and set the engine on the truck so you can set the angle of the carb and make sure there is no interference with the fuel tank when the carb is fully open.
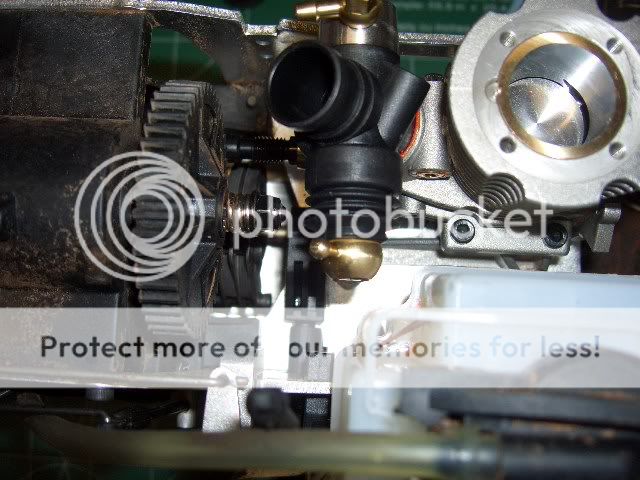
Once you are happy the angle of the carb, tighten the pinch bolt and seal up both sides of the pinch bolt by completely covering them. Do this on both sides.
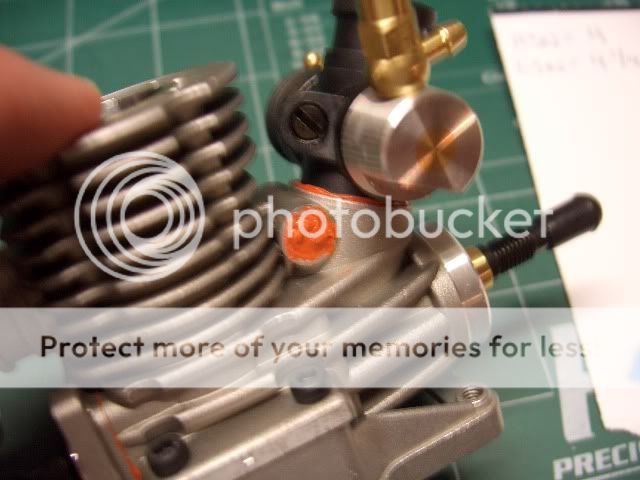
Now we are going to seal the carb needles. Before you begin, hold the carb closed with one hand and tighten the high speed needle until it stops carefully counting how many turns until it is fully closed. Write the number down and do the same for the low speed needle. These are your base settings from the factory. This is a good thing to do any time you get a new engine because alot of engine manuals don't mention the factory carb settings.settings.

Ok, go ahead and un-screw both needles and the idle speed screw. Look into the needle housing for anything unusual like o-ring shavings or any foreign debris. The Wasp .26 engine was notorious for having o-ring shavings or "worms" as they were called. They will give you headaches when you are trying to tune your engine.

Now grab your tube of Associated's Green Slime and put a small bead on the o-rings of the needles and re-install them by screwing them all the way in and backing them out to the settings they were at before you touched them. Be careful to to tighten them too much during this process, you can ruin them by cranking down to hard.


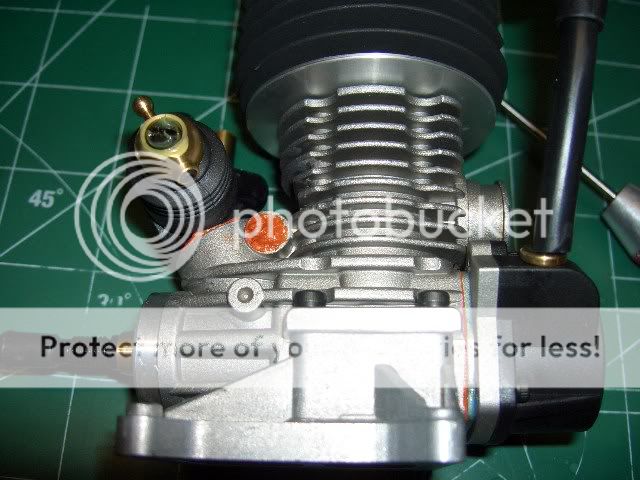
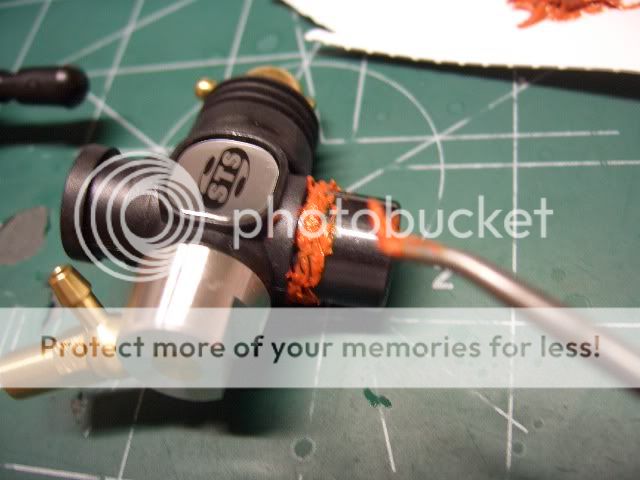
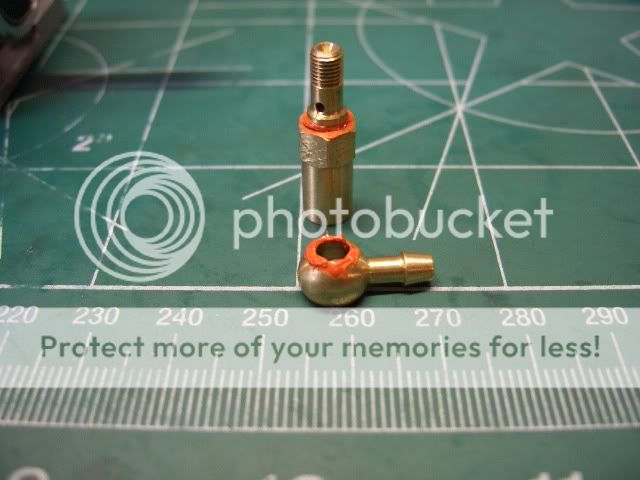
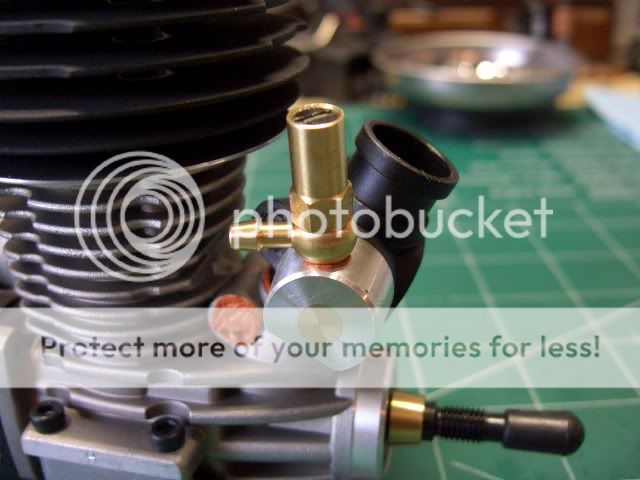
Now we are going to re-seal the fuel inlet fitting. Most carbs have a gasket on both sides of the fitting. If it does, I like to take the gaskets off and apply a thin layer of silicone on both sides of them and re-install. Now this particular engine does not utilize gaskets, it just uses a tapered seat, so I will apply a small amount of sealer to the mating edges of the fitting and housing being careful not to use too much because this fitting can be easily clogged by too much silicone and cause you all kinds of trouble. Be very careful with this brass fitting when tightening as it is very soft and can be easily broken. You don't have to wrench down hard, just snug. Be sure to point the fitting rearward for the Savage.
Well that's pretty much it. Just let the silicone cure for 24 hours before firing up the engine. By doing this you will save yourself from a lot of headaches concerning your engine..
First off you will need a clean work area. I like to use this Hobbico cutting mat. Give the area a good wipe down to eliminate the chances of foreign debris entering your engine. Here are some things you will need: A tuning screwdriver, a couple of good hex wrenches, blue loctite, silicone sealer (I like Permatex Utra Copper), your engine, piece of scrap thick paper (I use package tops) and a couple of things that didn't make it in the pic is some Team Associated's Green Slime grease, and some good nitro cleaner.
Another good thing to have with you as you disassemble your engine is the manual that came with your engine to refer to so there are no suprises along the way.
Now go ahead and take off the pullstart, backplate and head.
I like to use the lower part of a fuel container to put metal parts into for cleaning. You want to clean the areas you will be sealing so that the silicone can get a good bond to the metal surface.
I also like to go ahead and pull the sleeve out for a close inspection. Now be careful doing this because you don't want to damage this important part of your engine. Check it carefully for any burrs, or loose shavings. Do the same for the rest of the engine. look inside the crankcase for any burrs and/ or shavings and remove carefully. My other STS .28 engine had a piece of metal shaving in the crankcase.
Now take a clean cloth with some nitro cleaner on it and carefully clean the back of the crankcase (where the back plate bolts on). This will ensure a perfect seal for the back plate.
Most engines have an o-ring on the backplate. There is no need to mess with this- let it do it's job. We are just going to add some extra insurance by sealing the backplate. Squeeze a small amount of silicone sealer onto the thick paper. Dab a litle on your finger and put a very thin coat on the mounting surface of the crankcase.
Now place the backplate back on the engine being careful to align the crank pin on the crankshaft. It is important in this step to use loctite on the screws that attach the backplate. I like to use blue loctite, but HPI reccommends red. Red loctite is HIGH STRENGTH and makes it very difficult to remove if used on small screws like the ones used on our small nitro engines. Also, loctite the screws that hold your pullstart on as well. remember you don't need to crank down the pullstart bolts, they just need to be snug.
Here the backplate is loctited into place. Rememer to use the X- pattern when tightening the screws.
Next we will seal up the carburettor and pinch bolt. Start by applying a thin layer of silicone around the inside edges where the pinch bolt goes. Do this on both sides of the engine.
Next add a small amount of silicone to the upper neck of the carb. This engine has an o-ring down in the block to seal the carb opening. We are not going to mess with that- let it do it's job. We are just going to add more insurance by sealing the upper neck of the carb. Slide each half of the pinch bolt together from both sides and get the bolt started.
Now at this point, you want to go ahead install the engine mount and set the engine on the truck so you can set the angle of the carb and make sure there is no interference with the fuel tank when the carb is fully open.
Once you are happy the angle of the carb, tighten the pinch bolt and seal up both sides of the pinch bolt by completely covering them. Do this on both sides.
Now we are going to seal the carb needles. Before you begin, hold the carb closed with one hand and tighten the high speed needle until it stops carefully counting how many turns until it is fully closed. Write the number down and do the same for the low speed needle. These are your base settings from the factory. This is a good thing to do any time you get a new engine because alot of engine manuals don't mention the factory carb settings.settings.
Ok, go ahead and un-screw both needles and the idle speed screw. Look into the needle housing for anything unusual like o-ring shavings or any foreign debris. The Wasp .26 engine was notorious for having o-ring shavings or "worms" as they were called. They will give you headaches when you are trying to tune your engine.
Now grab your tube of Associated's Green Slime and put a small bead on the o-rings of the needles and re-install them by screwing them all the way in and backing them out to the settings they were at before you touched them. Be careful to to tighten them too much during this process, you can ruin them by cranking down to hard.
Now we are going to re-seal the fuel inlet fitting. Most carbs have a gasket on both sides of the fitting. If it does, I like to take the gaskets off and apply a thin layer of silicone on both sides of them and re-install. Now this particular engine does not utilize gaskets, it just uses a tapered seat, so I will apply a small amount of sealer to the mating edges of the fitting and housing being careful not to use too much because this fitting can be easily clogged by too much silicone and cause you all kinds of trouble. Be very careful with this brass fitting when tightening as it is very soft and can be easily broken. You don't have to wrench down hard, just snug. Be sure to point the fitting rearward for the Savage.
Well that's pretty much it. Just let the silicone cure for 24 hours before firing up the engine. By doing this you will save yourself from a lot of headaches concerning your engine..
")
